-
Article
-
Channel
-
Region
-
Season
-
Tag
Articles
-
 Video article 15:31
20 Camping Manners for Beginner Campers in Japan! Learn Proper Manners to Enjoy the Outdoors and Nature!
Things to Do- 67 plays
- YouTube
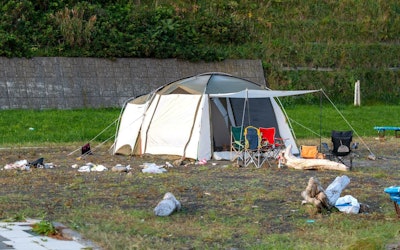
Japan's Camping Manners Camping is a leisure activity that allows people of all ages to enjoy a priceless time in nature. Japan is currently experiencing a camping boom. However, the sad reality is that some campgrounds have closed down due to lack of good manners, such as campers not picking up their trash. In this article, we'll go over Japanese camping manners to be careful of. Camping Manners Video Introduction This video, titled "20 Camping Manners for Beginners and New Campers Alike! [How to Get Started Camping: Camping Manners]" (キャンプ初心者さん、これからキャンプを始める方に伝えたいキャンプマナー20選 嫌だ!〜こんなキャンパー〜【キャンプのはじめかた:キャンプマナー編】), was uploaded by "Camp Lab" (キャンプ研究所). The video introduces useful camping etiquette, and is recommended for those who are just starting to enjoy outdoor activities, such as camping, as well as experienced campers. 20 Camping Manners to Know When Camping in Japan Photo:Camping manners Although manners vary from country to country and campground to campground many of these are useful no matter where you're camping. There's no one better to learn from than an advanced camper who's been doing it for years, someone who has experienced bad camping manners themself. Let's take a look at these 20 camping manners to keep in mind when camping in Japan! 1. Choose a Campsite After Checking In It's bad camping etiquette to have your friend or other campers that you came with hold a site for you while you check in. It's standard etiquette that you should only choose a campsite after you finish checking in to the campground. [Video] 1:16 - Choosing a Campsite 2. Set Your Tent Up Away From Other Campers Photo:A campground Setting up a tent right next to an already pitched tent is bad manners, especially when the site is large and there are many other places to set up a tent. Moreover, setting up a tent in such a place may spoil the scenery for other campers. When choosing a place to set up your tent, you need to consider the scenery of the tents that are already set up, as to not obstruct their view. [Video] 1:36 - Setting Up Your Tent 3. Avoid Cutting Through Other Campsites Care should also be taken to avoid entering other plots. While it's OK if you just cut a corner through a campsite, you should avoid doing it too frequently and avoid crossing through the middle of a campsite to avoid disturbing other campers. [Video] 1:56 - Other Campers' Plots 4. Avoid Taking Up Too Much Space It's also a violation of camping etiquette to take up too much space in a free site. This is a common sight at group campsites, where group tents are set up so far apart that other campers cannot easily fit in between them and will have to find other places to pitch their tents. On busy days, it can be difficult to find a place to pitch your tent. When setting up your tent, please be sure to take into consideration the crowded conditions, and make sure that the distance between tents is the same as other campers. [Video] 2:19 - Avoid Taking Up Too Much Space 5. Avoid Late Night Setups and Early Morning Takedowns Photo:A campground at morning Any activity that interferes with other campers' peaceful sleep late at night or early in the morning is also taboo. Driving stakes into the ground while others are sleeping can be disturbing. Even if you unintentionally arrive at the campground late at night, consider the time before loudly setting up. [Video] 2:56 - Late Night Setups/Early Morning Takedowns 6. Don't Leave Children Unattended Do not leave small children unattended. Campsites can be dangerous places, and they could get into some serious trouble. You wouldn't want to see them get seriously injured or badly burned by a campfire or other fire because you lost sight of them. [Video] 3:28 - Camping With Children 7. Be Careful When Playing With Flying Objects, Such as Balls, Frisbees, Drones, Etc. Photo:A drone Playing with flying objects is another thing to be careful of. When playing with balls, frisbees, drones, etc., you should always be careful to make sure that no one is around. Be sure to play in designated areas. You wouldn't like it if someone else's frisbee kept flying into your campsite, right? [Video] 4:16 - Flying Toys 8. Avoid Trouble With Your Kids At campsites, in order to avoid trouble, parents may need to find a place for their children to play in advance, or if the campsite does not have an open space, you might need to take measures to avoid your children from being scolded, such as not bringing play equipment that is unsuitable for that location (i.e., flying toys in small areas). [Video] 5:13 - Be Aware of Your Children 9. Avoid Causing Noise Pollution Noise is a common cause of trouble, as loud noises can be annoying. Adjust the volume when enjoying music or movies, and be considerate of the time of day. Remember that the campground is a public place. [Video] 5:40 - Noise Pollution 10. Be Careful When Consuming Alcohol Photo:Enjoying drinks while camping The video also touches on drinking manners. Don't mistake the campground for a bar/izakaya and overdo it. It's important to be aware of the time of day, and to be aware that you may disturb other campers while they're sleeping. Video] 6:35 - Manners for Consuming Alcohol 11. Keep the Cooking Area Clean It's bad camping manners to make a mess in the cooking area. Leaving food scraps and other debris in the cooking area drains is disrespectful to other campers. When washing cooking utensils, bring detergent, sponges, and plastic bags. [Video] 7:22 - Keeping the Cooking Area Clean 12. Be Careful of Sparks From Campfires Photo:A campfire When enjoying a campfire, be careful of sparks. Sparks can fly not only on your tent, but also to neighboring campers' tents and other gear. Sparks may scorch your tent or other items, so please be careful. [Video] 8:07 - Campfire Sparks 13. Open Flame Cooking Is Not Allowed at All Campgrounds Don't perform open flame cooking in an area where open flame cooking is prohibited. It's a violation of both manners and rules. It may even lead to a wildfire in some places. [Video] 9:07 - Check if Open Flame Cooking Is Allowed 14. Don't Burn Garbage in Campfires Burning garbage in a campfire is another violation of camping manners. Burning trash creates unwanted smoke and odors. [Video] 9:44 - Don't Burn Garbage in Campfires 15. Be Respectful Even When Staying in a Car Photo:Sleeping in a car Be careful not to leave the engine running overnight when staying in a car. The noise can disturb other campers. Overnight stays in a car should be done in a parking lot. [Video] 10:18 - Manners for Overnight Stays in a Car 16. Manners Regarding Pets The video touches on manners regarding pets as well. It's bad manners to release pets without a leash. Pets can bite other campers and cause major problems. [Video] 11:04 - Pet Manners 17. Be Aware of Your Surroundings When Setting off Fireworks Do not disturb others with fireworks. Sparks may fly and scorch tents and other objects. [Video] 11:56 - Fireworks Manners 18. Separate Garbage Properly Photo:Camping manners In Japan trash is separated by type. Be sure to properly separate trash, even at campsites. [Video] 12:26 - Separating Trash 19. Leave Your Campsite Cleaner Than It Was When You Got There It's also bad manners to leave your campsite messy when you're finished camping. Make sure you don't leave behind any garbage or charcoal. Try to leave your campsite cleaner than it was when you arrived. [Video] 12:48 - Clean Your Campsite 20. Everyone Has Their Own Way of Enjoying Camping Everyone enjoys camping in their own way. It's also bad manners to impose your own values on other people. [Video] 13:12 - Camping Is Different for Everyone Enjoy Camping in Japan With Proper Manners! When camping, it's important to have good manners as well as to follow the rules of the campground. It's also important to gather information about prohibited items and equipment at the campground in advance. Trouble can be caused by violations of manners regarding garbage disposal, illegal dumping, noise in common spaces, and many other factors. When camping in Japan, it's important to respect nature, have good manners, keep other campers in mind to avoid any problems. -
 Video article 3:30
Hachijojima - The Closest Tropical Resort to Tokyo. Relax and Rejuvenate in the Great Outdoors!
Things to Do- 75 plays
- YouTube
Hachijojima - Enjoy the Tropics From Tokyo! This video, titled "Hachijojima Diving Shop ARABESQUE Introduction Video" (Hachijojima Diving Shop ARABESQUE Introduction Video 八丈島ダイビングショップ アラベスク紹介動画), was uploaded by "KIRIN SEKITO." It introduces Hachijojima, a sub-tropical island of Tokyo! Hachijojima, one of the Izu Seven (a group of islands near Japan's Izu Peninsula), is a volcanic island with a population of 7,144 (as of September 27, 2021) located in Hachijo, Tokyo, in Japan's Kanto region. Hachijojima is a popular tourist attraction for being the closest tropical resort to Tokyo. There are two ways to get to Hachijojima: by air (50 minutes) or by ferry (11 hours) from Tokyo Haneda Airport. Since Hachijojima is a popular tourist attraction "in" Tokyo, there is a wide range of tours and hotels. This video introduction to the Hachijojima diving shop "Arabesque" shows the many attractions of Hachijojima. The Fascinating Tropical World of Hachijojima Photo:Sea turtles, Hachijojima Scuba diving and snorkeling are activities that we highly recommend trying when traveling to Hachijojima. The waters of Hachijojima are known as "Hachijo Blue" and are crystal clear. A variety of marine life can be observed in the waters as well. Hachijojima is also known as "Turtle Island," and is home to a large population of sea turtles. In the video, you can see sea turtles swimming beautifully at 1:31. You can also see a wide variety of other marine life, such as coral colonies, anemones, eels, and the Japanese pygmy seahorse. The area is also home to bigfin reef squid and longfin yellowtail, making it a popular fishing spot. At the beach/diving spot Nazmad, visitors can see hammerhead sharks and other big fish. In winter, humpback whales visit the area, allowing you to enjoy whale watching. Night snorkeling is another activity we recommend trying as you get to experience the world of fish at night. Hachijojima - Explore Everything This Tourist Attraction Has to Offer! Photo:Trekking on Hachijo Fuji, Hachijojima Besides the ocean, Hachijojima is full of other natural wonders and power spots. Hachijo Fuji, where you can enjoy hiking and trekking, Okataura Park, Uramiga-taki Waterfall, and Nambara (Nanbara) Senjojiki, where you can enjoy the great outdoors. The area is also home to rare birds that make the island great for bird watching. Other popular tourist spots include Ozato Tamaishi, Ubai Homei Shrine (優婆夷宝明神社), and other power spots where you can feel the history of Hachijojima, Goshinyama Park, Hachijo Botanical Park, Karataki Waterfall, Iwonuma Pond (硫黄沼), and "Hego Forest" with its beautiful ferns. Hachijo Island also offers a wide variety of delicious local foods, such as shima-zushi (lit. "island sushi") and "Hachijo shochu," and you can purchase local products, such as kusaya, as souvenirs. There is also a wide range of lodging facilities on the island, including open-air baths with spectacular views and resort hotels. Buses and taxies are available, but renting a car is the most convenient way to get around Hachijojima. Arabesque - Diving at Hachijojima! Photo:Scuba diving If you want to enjoy the waters of Hachijojima, be sure to check out the diving shop "Arabesque"! Arabesque is a diving shop that has it all. The interior of the shop is well thought out, creating a comfortable atmosphere with shower rooms and other amenities. At Arabesque, visitors can enjoy experience diving and snorkeling. Underwater photography is also available. One-on-one lessons are offered for beginners and children, with safety as a top priority. In addition, they also offer barbecue and provide recommendations for various ways to enjoy Hachijojima. Hachijojima - A Tropical Island Just 50 Minutes From Tokyo Hachijojima is a tropical resort where visitors can experience the extraordinary in Tokyo. Although natural disasters, such as earthquakes and typhoons can occur, more and more people are moving to Hachijojima in recent years, fascinated by its natural beauty. Consider visiting Hachijojima and experiencing the great outdoors of Japan firsthand! 【TripAdvisor】Hachijojima https://www.tripadvisor.com/Tourism-g1122052-Hachijo_jima_Hachijo_jima_Hachijo_machi_Tokyo_Prefecture_Kanto-Vacations.html -
Video article 6:05
Three Essential Rope Knots for Camping and the Outdoors! Two Half-Hitches, Taut-Line Hitch, and the Bowline Knot; Easy Knots for Beginner Campers and Outdoor Enthusiasts!
Things to Do- 140 plays
- YouTube
Must-Know Knots for Campers Japan's camping boom has led to an increase in the number of people who have just started camping or are looking to get into camping. In this article, we'll introduce three useful knots for beginner campers, so anyone new to camping can familiarize them with knots, which are essential for setting up tents and tarps and a variety of other tasks. Video Introduction This video, titled "[Super Convenient] 3 Useful Rope Knots for Camping [Two Half-Hitches, Taut-Line Hitch, Bowline Knot]" (【超便利】キャンプで役立つロープの結び方3選【ツーハーフヒッチ・自在結び・もやい結び】), was uploaded by "MotoCamp" (MotoCamp【モトキャンプ】). Useful Knots for Camping and Other Outdoor Activities and How to Tie Them Photo:A knot Knots are incredibly useful for camping and outdoor activities. They can be used to secure tents to stakes or even hang a tarp. Furthermore, ropes are also very useful for hanging small camping equipment and drying dishes. However, if you just have a rope and don't actually learn how to tie knots, the rope is nothing more than a piece of rope. Therefore, learning how to tie knots is an important component of a comfortable camping trip or outdoor experience. Unfortunately, learning how to tie knots can be a bit challenging for beginners. Therefore, in this article, we'll introduce three practical knots that even beginners can learn. They're useful for camping and outdoor activities, so take this opportunity to learn them! How to Tie a Two-Half Hitch Source :YouTube screenshot The first knot we'll learn is the "Two-Half Hitch." [Video] 0:20 - Two Half Hitch This knot has three features: ・It's easy to tie ・It's relatively tight ・Useful for setting up tarps Now, let's take a look at how to tie it. Be sure to follow along with the video to see an actual demonstration of how each knot is tied. 1. Take the short end of the rope and pass it under the long end and then pull the short end through the loop it creates. 2. Do the exact same thing directly below the first loop and then pull the short end of the rope upwards towards to first knot to tighten it. 3. Pull the long end of the rope tight and you're done! The rope will now be securely fastened to the post. It's easy to untie this knot, so be sure to try it a few times to make sure you've got the hang of it. How to Tie a Taut-Line Hitch Source :YouTube screenshot The second knot we'll talk about is the "Taut-Line Hitch." [Video] 1:24 - Taut-Line Hitch The features of this knot are as follows: ・The length of the rope can be easily adjusted. ・Convenient for securing stakes when setting up a tent. Now let's take a look at how you tie a Taut-Line Hitch. 1. Once again, take the short end of the rope and pass it under the long end and then pull the short end through the loop it creates. 2. Again, just like the Two-Half Hitch, do the same thing below the first knot, except this time create some distance between the first and second knots. 3. Then, pass the shorter rope through the loop created between the two knots once more. 4. Tie another knot below the second knot. Finally, tighten the rope and you're done. The rope doesn't wiggle when pulled, but the length can be adjusted by holding above the knot and pulling. How to Tie a Bowline Knot Source :YouTube screenshot The final knot we'll go over is the "Bowline Knot." [Video] 3:59 - Bowline Knot The perks of this knot are: ・It's tight ・Convenient for securing ropes It takes some practice, but it is one of the most important and basic knots, and is essential for enjoying outdoor activities and camping. With that out of the way, let's learn how to tie a Bowline Knot. 1. Make a loop with the longer rope. 2. Below that loop, pinch the rope together and pass it through the loop you just made from the top. 3. Pass the end of the shorter rope through the loop sticking out of the other loop from underneath. 4. Pull the short long end away from the short end to form a knot. This secures the knot and completes the Bowline Knot, which will not budge in the slightest. This knot is also called the "King of Knots." Because of its strength, this knot is frequently used not only for camping and outdoor activities, but also for mountain climbing, loading trucks, and even on construction sites. If you're employed in a field that uses knots, the Bowline Knot can be incredibly useful. Summary of Essential Knots for Beginner-Level Outdoor Enthusiasts Photo:Guy lines There are many more knots than this. If you're serious about camping, mountain climbing, or any other outdoor activities, learning how to tie knots is important. If you can learn how to tie knots, you'll be able to set up tarps, tents, and hammocks using trees and rocks even in places where the ground is too hard for stakes. Knots can also be used to secure yourself to something in the event of a natural disaster, or to carry an injured or sick person to safety. Finally, here are a few more important knots you can look up. ・The Figure-Eight Knot: A knot that won't come undone even if it's caught on something. ・The Clove Hitch: A knot that acts as a stopper when your rope is not long enough. ・The Butterfly Knot (Butterfly Loop): Convenient and practical for hanging something or for drying clothes. ・The Trucker's Hitch: which can be more strongly secured by tying a double knot. All of these knots are useful for camping and outdoor activities. If you try to learn too many at once, it may be difficult to remember how to tie them. We recommend by starting with the three knots shown in the video so that you can use them immediately in camping and outdoor situations. They may come in handy in unexpected situations! -
Video article 11:19
Enjoy a Cup of Pure Bliss in the Great Outdoors! Enjoy an Out-of-the-Ordinary Experience With Coffee Brewed From the Spring Water of Oike Spring in Oita Prefecture
Nature- 33 plays
- YouTube
This video, titled "[Hiking] Coffee From a Spring - A Walk in the Woods and a Quiet Time" (【ハイキング】湧き水でコーヒー - 森林散策と静かな時間), was released by "Morinone Channel" (モリノネチャンネル). Wouldn't it be wonderful to make coffee from a clean spring in the mountains and take in the magnificent scenery? The Oike Spring Group in Yufu City, Oita Prefecture, introduced in the video, is an area at the source of the Aso River. The rainfall on Mt. Kurodake is filtered underground over a long period of time to produce clean spring water. It's very comfortable and cool even in summer as it is located 850 meters above sea level. Sitting under a tree, boiling water from the spring with a portable stove, and drinking coffee will refresh your body and mind. -
Video article 32:48
Solo Camping in the Great Outdoors Is Where It's at! Cooking Your Own Catch and Enjoying an Open Air Bath!
Things to Do- 26 plays
- YouTube
This video, titled "Staying in a One Man Tent and Going Big-Game Fishing in the Small Boat I Bought With My Part Time Job!" (アルバイトして買った小舟で大物釣りして一人用テントに泊まったよ!), was released by "CartopboaterNORA." Solo camping is becoming more and more popular in Japan, where people are enjoying the outdoors on their own. It's very exciting to load up your car with handy camping gear and head out to a secluded spot. In this video, they used a small boat to go fishing and caught a monster! Nothing beats cooking your own food in the great outdoors. They set up their tent in the small boat they used, so they didn't have to worry about it being windy. If you want to spend your holidays with a sense of fulfillment, why not try some camping? -
Video article 17:07
Five Outdoor Knives That Are Essential for Camping! Various Knives That Can Be Used for Cooking and Bushcraft, and How to Care For Them!
Things to Do Nature- 36 plays
- YouTube
A Look at Five Outdoor Knives for Any Camping Situation! This video, titled "Recommended [5 outdoor knives] Which is the most popular one?" was released by "solo camp & camp cooking in Japan TANA channe." It introduces popular camping equipment, including outdoor knives. Outdoor knives can be used for many purposes, such as cooking, for use in bushcraft, and in worst case scenarios to chop wood, or as a survival tool in the event of a disaster. The video describes the feel and weight of the knives as well, so be sure to use it as a refence when purchasing an outdoor knife in Japan! The Different Outdoor Knives Introduced in the Video Source :YouTube screenshot Introduced from 1:53 is Opinel Knives’ "Opinel Carbon # 9" and "Stainless Steel # 7" which are made of carbon steel. Introduced from 8:04 is Kai’s "Shun" series knife which is a Santoku knife that is ideal for cutting apples and other fruits when cooking outdoors. Tana also recommends the Swedish brand "Mora Knife," Mcusta's "Damascus Knife," and the large Hogue Knife “EX-F01 Combat Knife." Choosing an Outdoor Knife Shown in the Video Photo:Various outdoor knives Outdoor knives can be purchased not only at specialty stores, but also online and at home improvement stores across Japan. The most popular are outdoor knives and tool knives that are made in Japan. We recommend checking out the various types (universal/specialized, etc.), the material (steel, carbon, etc.), the grind (flat grind/hollow grind, etc.), and the safety features, such as lock functionality, as well as cost performance when looking for the knife that is right for your outdoor experience. Also, check the material and durability of the blade, the length of the blade, and the portability, including whether or not it can be folded. When purchasing an outdoor knife in Japan be careful not to infringe on the Firearm and Sword Possession Control Law! Maintenance and Sharpening of Outdoor Knives Source :YouTube screenshot If you neglect proper maintenance on your outdoor knife after using it and put it back into its sheath it may rust while in storage. Be sure to clean your knife with a neutral detergent and lukewarm water. At 3:30, you can also see how a whetstone is used to sharpen a knife. Summary of Various Outdoor Knives for Camping In addition to the ones shown in the video, there are various other types of outdoor knives, including camping knives, Swiss army knives, folding knives, and more. If you get a knife to bring on camping trips, you can enjoy outdoor cooking and making excellent camping meals. Find the outdoor knife that works best for you and get out and enjoy the great outdoors! -
Video article 47:28
Introducing the 7 Best Single Burners for Outdoor Camping! Compact, Versatile and Convenient Gear! Check Out This Video to See the Amazing Performance of These Wind-Resistant Burners!
Things to Do- 40 plays
- YouTube
About the Video Showing the Single Burners This video, titled “Seven Single Burners | Comparing Popular Brands | Beginner Friendly | Choose OD Gas or CB Gas,” was uploaded by “solo camp & camp cooking in Japan TANA channe.” The video introduces single burners that can be used for camping or other outdoor activities, while going over how to choose them, as well as how each is used. A single burner is a piece of camping gear that can be used outdoors to boil water, cook camping meals, and more. They're a must for any solo or group camping trip! The Single Burners Recommended in the Video Source :YouTube screenshot The 7 single burners introduced in the video are as follows: ・Soto Shinfuji G'z G-stove STG-10 (Soto Shinfuji G'z G-ストーブSTG-10) (Video ~5:01) ・Soto Regulator Stove ST-310 (Video ~14:06) ・Coleman F-1 Power Stove JCM-S106A (Video ~21:27) ・Primus P-153 Ultra Burner (Video ~25:53) ・Iwatani Primus 2243 BUrner IP-2243PA (Video ~32:23) ・Snow Peak HOME &CAMP Burner Silver GS-600SL (Video ~36:40) ・EVERNEW AL Titan grate for Stove EBY253 (Video ~42:30) Although not listed here, manufacturers such as Iwatani also sell single burners. OD cans (outdoor cans) and CB cans (cassette gas bombe cylinders) can be used as fuel for single burners. Easy-to-Use Single Burners, as Shown in the Video! Photo:A single burner In addition to camping and mountain climbing, single burners can also be used as emergency equipment in times of disaster, typhoons, earthquakes, and other emergencies. Partition or unified single burners can be easily purchased at home centers or outdoor supply stores, and have relatively low running costs. The reason for their popularity is that they have sufficient heat, can be easily used for everything from boiling water to outdoor cooking, and are easy to use and maintain. Uses and Precautions for the Single Burners Shown in the Video Photo:A campground at night Lighters needed to light the burners can be found at supermarkets and convenience stores. Campers may use gas, kerosene, solid fuel burners, alcohol burners, and white gas lanterns for outdoor cooking and light. Also, if you have an igniter cartridge, you don't need a lighter to use it. However, while convenient to use, you need to be careful about fire accidents and gas leaks due to incomplete combustion. Summary of the Single Burner Introduction Video The single burners shown in the video are compact, portable, wind-resistant and very convenient. If you have a griddle and a stove, you can cook some delicious camping food. If you want to enjoy the outdoors to the fullest, then definitely consider picking up a handy single burner like the ones shown in the video! -
Video article 10:02
[Summer Camping] 12 Camping Essentials to Beat the Heat and Protect Against Insects! Safety Precautions for Japan's Hot Summers and Cool Campgrounds!
Things to Do- 36 plays
- YouTube
Japan's Hot and Humid Summers Summer in Japan is hot and humid. When camping in Japan, it's essential to take measures against both the heat and insects. In this article, we'll introduce some recommended items to protect against the heat and keep insects away so you can enjoy an exciting summer camping trip in Japan. Video Introduction Photo:Women being bitten by bugs This video, titled "12 Recommended Items to Protect Against Heat and Insects When Summer Camping" (夏キャンプの暑さ対策・虫除け対策に買って良かったおすすめアイテム12選をご紹介), was uploaded by "Camp Lab" (キャンプ研究所). When camping in summer, preventing insect bites and heat stroke is crucial to enjoying a safe camping trip. There are many dangerous insects in Japan, and it's important to take all possible precautions. In addition, many people succumb to heat stroke and other health problems in Japan's hot and humid summers. If you take proper measures to protect yourself from insects and heat, you can avoid dangerous situations, so be sure to keep reading so you can be prepared. 6 Tips to Keep Bugs Away When Summer Camping in Japan The first item introduces is the "Fuji Nishiki Power Forest Incense," an insect repellant item that forestry professionals also recommend. As this is professional-grade, the thickness and size are quite different from those for general use. You can see how they're used in the video. [Video] 0:57 - 1. Fuji Nishiki Power Forest Incense Mosquito Repellent Source :YouTube screenshot The next item is bug spray. We recommend a skin-friendly, DEET-free insect repellent that is safe for children to use. The video recommends commercial insect repellent sprays, as homemade sprays made with ingredients such as peppermint don't last as long. [Video] 2:04 - 2. Insect Repellent DEET has long been used in insect repellents in Japan, but more and more parents are avoiding it when it comes to their children because of its side effects that can cause skin problems. It's also important to avoid exposing skin to insect bites as much as possible when summer camping. Leggings and pants that cover the skin are especially important to protect against bites. [Video] 2:58 - 3. Leggings Next, the "Yabu Mosquito Barrier" is a type of spray that is sprayed on the grass around your tent to create a barrier effect. [Video] 3:29 - 4. Yabu Mosquito Barrier Source :YouTube screenshot In addition, insect repelling LED lanterns are a recommended nighttime insect repellant. [Video] 4:11- 5. Insect repelling LED lantern Taking advantage of the nature of insects to be attracted to ultraviolet rays, placing a lantern with built-in UV a slight distance from your camp prevents insects from being attracted to your campsite. Poison Remover is a useful first aid item for treating venomous insect stings. The syringe-like container allows pinpoint suction of the sting. [Video] 5:06 - 6. Poison Remover 6 Heat Protection Essentials for Summer Camping in Japan Photo:A portable fan The following items are recommended for protection against the heat when summer camping. Portable fans have clips and can be attached to car handles or tables and can also be used as stand-alone fans. [Video] 6:03 - 1. Portable electric fan Quick-drying, antibacterial, deodorizing, super-cheap sports shirts. Sports shirts are great for summer camping as you'll likely be hot and sweat throughout the day. [Video] 7:00 - 2. Sports shirts Cooling spray is a spray for clothing. It's an excellent product that allows you to feel a cool sensation just by spraying it on your clothes. [Video] 7:23 - 3. Cooling spray Gatsby Facial Paper with strong menthol is an item that gives you a cool and refreshing feeling just by wiping your skin with it, and it's cost-effective, too! [Video] 7:39 - 4. Gatsby Facial Paper Cooling towels are wetted and used as is. If you don't have a cooling towel, you can use a regular towel. [Video] 8:15 - 5. Cooling towel A cooling face gaiter is an amazingly useful product that makes you feel cooler just by putting it on your face. [Video] 8:40 - 6. Cooling face gaiter Summary of Summer Camping in Japan Photo:A woman enjoying solo camping This article introduced useful goods recommended for summer camping to protect against heat and insects. Japan's rainy season can feel hotter than you might think, so make sure you have the right heat protection gear, and be careful of heat stroke. Also, by taking all possible measures against insects, you'll be able to prevent unexpected accidents. We hope the information in this article will be of use during your next summer camping trip. If you want to camp in an area that's as cool as possible in the summer, it's important to choose the right campground. For the most part, campgrounds at higher elevations tend to be cooler. Also, here are some campgrounds that are considered relatively cool even in Japan's hot summers. ・Ontake Natural Recreational Forest Kurumijima Campground (Gifu) ・Togakushi Campground (Nagano) ・MUJI Minami-Norikura Camping Ground (Gifu) ・MUJI Campground Campania Tsumagoi (Gunma) ・Kyukamura Tsumagoi Kazawa Camping Ground (Gunma) That being said, with summer temperatures getting hotter and hotter each year, even at cooler campgrounds, you musn't let your guard down. Be prepared for the heat and insects, and enjoy your summer camping experience. -
Video article 3:21
Nagatoro Auto Campground, Chichibu-gun, Saitama Prefecture, for families, is very popular among female campers! Well-equipped tent sites, accommodations, and water activities are also available!
Things to Do- 99 plays
- YouTube
A Campsite Close to Tokyo NAGATORO AUTO CAMP SITE in Saitama is conveniently located approximately two hours from Tokyo by car. Camping is very popular in Japan today, where visitors can escape the hustle and bustle of the city and enjoy the great outdoors. The spacious site is equipped with both camping and glamping facilities, as well as bungalows. Many people use these facilities to immerse themselves in nature and get away from their day-to-day troubles. Video introduction of Nagatoro Auto Campsite, Nagatoro-cho, Chichibu-gun, Saitama Photo:Nagatoro Gorge This video, introducing NAGATORO AUTO CAMP SITE in Nagatoro, Saitama via aerial footage, was uploaded by "Campism." NAGATORO AUTO CAMP SITE is a vast family campground located in Nagatoro, Saitama, a town rich in nature. It's also popular for water-based activities! The campground offers a full range of accommodations, including camping, glamping, and bungalows. There are also barbecue spaces and a riffle where campers can play in the river, as well as facilities that accommodate female campers. A variety of camping styles can be enjoyed here. 7 Types of Tent Sites! Women-Only, Solo Sites, and More! Photo:Camping at night There are seven types of tent sites available for camping! Women-only and solo sites are also available. P: Premium Site M: Forest Site S: Starry Sky Site A: Aozora Site V: View Site H: Hammock Site D: Dog Free Site [Video] 0:45 - The different tent sites The spacious "view site" is an area along the river paved with bricks. The main reason for its popularity is that it overlooks the lovely Arakawa River. The "Premium sites" are individually separated and private, taking advantage of the natural terrain along the river. Perfect for those who want to enjoy camping with just family and friends! The "Girls' Site," for women only, is often used for events. Located in the central area of NAGATORO AUTO CAMP SITE, the "Aozora Site" is a spacious site with a view of the blue sky on clear days. There's also the "Hammock Site" popular among families, "Starry Sky Site" where you can gaze at the stars on a clear night, and the "Forest Site" surrounded by trees through which the sunlight filters through beautifully. Furthermore, there's the "Dog Free Site," which is fenced off for campers with dogs so that they can enjoy some time off their leashes. The Solo Site provides exclusive campsites for one person, which is great for solo campers looking to camp in this location. A Full Range of Accommodations, Including Popular Glamping Accommodations and Bungalows Source :YouTube screenshot NAGATORO AUTO CAMP SITE also offers a full range of accommodations, including the popular glamping and bungalow facilities. Glamping is a stylish way to enjoy camping, and there are two types of rooms to choose from. There are indoor glamping tents where guests sleep in tents pitched indoors, and glamping cottages with stylish bohemian and oriental-style interiors, each with rooms for 2 and 4 persons, respectively. All bungalows are equipped with a roof and a kamado (Japanese-style cooking stove), so you don't have to worry about the weather. There are a variety of types to choose from, including standard wooden bungalows, bungalows unique to this area, and bungalows with Wi-Fi and pet-friendly facilities. [Video] 2:20 - A look at the accommodations NAGATORO AUTO CAMP SITE - Comfy for Female Campers and Small Children! Source :YouTube screenshot NAGATORO AUTO CAMP SITE has a full range of facilities for female campers and small children. A brightly lit women-only powder room and women-only shower room are available, as well as "Waku Waku Hiroba," and "Ehon no Heya" (lit. "Picturebook Room"), two spaces for small children to play. A wide range of products are sold at the local store, from food and seasonings to kitchenware, daily necessities, outdoor goods, and official NAGATORO AUTO CAMP SITE goods. Tools, such as pots, pans, BBQ stoves, and cooler boxes can be rented here as well. Summary of NAGATORO AUTO CAMP SITE There are various sightseeing spots around NAGATORO AUTO CAMP SITE. You can enjoy fishing in the river as well, but we recommend playing in the river and soaking up the sun. Nagatoro Line Kudari is an exciting boat ride down the Arakawa River, and popular activities such as SUP (Stand Up Paddle Boarding) and rafting can also be experienced here as well. Other attractions include Mukuge Nature Park, where visitors can enjoy seasonal flowers, and Hodosan Shrine, one of the three shrines in Chichibu and awarded a Michelin Star by the Michelin Green Guide Japan. In addition, there are various tourist attractions, such as the Saitama Prefectural Museum of Nature, which exhibits plants and fossils found in Chichibu and Nagatoro, Nagatoro Iwadatami, formed from uplifted schist, and a day spa to soothe the body and mind. The video shows the charms of NAGATORO AUTO CAMP SITE surrounded by rich nature via beautiful drone footage. Be sure to check it out. Consider visiting NAGATORO AUTO CAMP SITE, a great place for female campers and an area close to central Tokyo where even small children can enjoy themselves! NAGATORO AUTO CAMP SITE Facility Information 【Address】559-1 Ido, Nagatoro, Chichibu District, Saitama 369-1312 By car: 20 minutes from the Hanazono Interchange via the Kanetsu Expressway. By train: 20 minutes on foot from Nogami Station via the Chichibu Railway line. 【Phone】0494-66-0640 【Fax】0494-66-0441 【Camping Season】March 10 - December 26 【Campsite Office Hours】9:00~17:00 【Pricing】 Camping: ¥2500~ (Excluding women only and solo camping) Glamping: ¥19,000~ Bungalows: ¥11,000~ (If air-conditioned) ※Fees vary by type of camping and season. A separate facility use fee of 600 yen for adults and 300 yen for children (free for preschool children) is required for each night of stay. 【Reservations】Reservations can be made through the "Availability Search/Online Reservations" on the official home page. (The blue box) 【TripAdvisor】NAGATORO AUTO CAMP SITE https://www.tripadvisor.com/Hotel_Review-g1121091-d13295986-Reviews-Nagatoro_Auto_Campsite-Nagatoro_machi_Chichibu_gun_Saitama_Prefecture_Kanto.html -
Video article 1:06
Experience an Exciting Glamping Trip in Oita, Japan! Yufuin Onsen Glamping Comorebi's Luxury Camping Experience Is Like Staying at a Resort Hotel!
Things to Do- 43 plays
- YouTube
Japan's Popular 'Glamping' Glamping has become increasingly popular in Japan since around 2020. When it comes to camping, there's a lot of preparation required; you prepare a tent, sleeping bag, cooking utensils, and other luggage, load them into a car, and head out to the location hoping you didn't forget anything. Cooking is also a popular activity enjoyed when camping, and is one of the best parts of the experience. Glamping facilities, with their full range of services, are attracting attention from people who want to get away from their daily routine and enjoy nature, but want to do so in a more casual and luxurious way than camping. Video Introduction In this article, we'll introduce "Yufuin Onsen Glamping Comorebi" (湯布院温泉郷グランピングCOMOREBI), a video uploaded by "COMOREBI Glamping" (COMOREBIグランピング). Yufuin Onsen Glamping Comorebi is a popular accommodation where visitors can enjoy nature while also receiving hotel-like hospitality. If you're looking to enjoy the famous hot springs of Oita, consider checking out Yufuin Onsen Glamping Comorebi as well. Glamping – A Luxurious Camping Experience Photo:Glamping Glamping, which has been attracting a lot of attention in recent years, is a combination of the words "glamorous" and "camping," which, as these words suggest, refers to a glamorous camping experience. Glamping is truly a dream-like, luxury camping experience, where beds, bathrooms, and amenities are pre-prepared, and you can spend your time in luxury and comfort in the midst of Mother Nature's majestic beauty. Some glamping facilities offer cottages and trailer houses with showers, toilets, and even kitchens for outdoor cooking. Yufuin Onsen Glamping Comorebi Source :YouTube screenshot Yufuin Onsen Glamping Comorebi, featured in the video, is one of the largest glamping spots in Japan's Kyushu region. There are four types of tent styles offered at the campground: oval and dome tents, LOTUS BELLE tents, and "light boxes." The private outdoor-dining spaces are air-conditioned and heated, with impressive Simmons beds and custom-made furniture. There are also tents with hammocks and pet tents exclusively for pets. Enjoy movies, music, or even yoga in the relaxing tents. [Video] 0:34 - Inside the tents Hot Springs and Delicious Meals at Yufuin Onsen Glamping Comorebi Source :YouTube screenshot For dinner at Yufuin Onsen Glamping Comorebi, you can enjoy French-style course meals supervised by Chef Isao Kuroiwa, who trained at a three-star European restaurant. For lunch, there is also a camp cooking plan that includes barbecue. The mildly alkaline simple hot spring "Bijin-no-yu" (美人の湯, lit. "Spring of Beauty") is rich in moisturizing components, is effective at whitening and beautifying the skin, and features a high content of metasilicic acid. [Video] 0:25 - Bijin-no-yu Day Trips and Other Ways to Enjoy Yufuin Onsen Glamping Comorebi Source :YouTube screenshot Enjoy doing yoga in the morning sun, enjoying a drink under the stars, or taking a nap in a hammock. Doing nothing and simply letting go while taking in the surrounding nature is another way to enjoy oneself. Yufuin Onsen Glamping Comorebi offers both overnight stays and inexpensive one-day plans, so be sure to take advantage of these as well. Summary of Yufuin Onsen Glamping Comorebi Yufuin Onsen Glamping Comorebi, introduced in the video, is a great option for those looking to enjoy nature and outdoor cooking, but don't want to deal with the trouble of packing everything like you would for regular camping.... The appeal is that you don't need camping gear or even equipment for an overnight stay. Experience a new type of luxury camping where you can enjoy nature and receive resort hotel-like services! -
Video article 14:13
An Advanced Camper's Top 8 Items to Keep Away Insects! Useful Goods for Both Adults and Kids for Camping in Japan!
Things to Do- 75 plays
- YouTube
Insect Repellent Is Essential for Camping in Japan's Humid Weather Japan is experiencing an unprecedented camping boom right now! The Corona pandemic has made it a popular leisure activity for both families and solo campers alike. However, many areas in Japan are humid, resulting in high numbers of mosquitoes and other insects. In the forest, there are more mosquitoes and bees than in the city, so insect repellent is a must. In this article, we'll introduce some strategies to protect against insects when camping in Japan! Bug Spray Video Introduction Photo:Women getting bit by mosquitoes This video, titled "Top 8 Items to Keep Away Insects When Camping" (キャンプの虫対策に買って良かったおすすめアイテム8選をご紹介), was uploaded by "Camp Lab" (キャンプ研究所). The video introduces 8 items recommended by an experienced camper to prevent being bitten by insects. It's hard to enjoy camping when you keep getting bitten by mosquitoes. You might not even enjoy camping outdoors anymore because you're afraid of being bitten by insects. If you are one of those people, then be sure to keep reading so you can enjoy nature again! Take all possible measures against insects so you can have fun camping! Fujinishiki Power Forest Incense for Professional Use Photo:A mosquito coil Fujinishiki Power Forest Incense is a mosquito coil famous for being used by forestry professionals. Compared to ordinary mosquito coils, it is about three times larger and thicker. Of course, the larger size means more smoke, but the main ingredient used is metofluthrin, which is has no effect on the human body. The coil lasts for about 4 hours. In the video, it's recommended that two of these be used together. A special portable incense container for this mosquito repellent incense is available on Amazon and other online retailers. [Video] 1:45 - Fujinishiki Power Forest Incense Yabu Mosquito Barrier to Spray Around Tents Source :YouTube screenshot Yabu Mosquito Barrier is a convenient spray that can be sprayed directly onto the ground or grass. Spraying it around the area where you'll be camping will create a barrier effect. Combined with the above-mentioned Fujinishiki Power Forest Incense, it's said to be incredibly effective. [Video] 4:30 - Using Yabu Mosquito Barrier Electric Insect Killer LED Lantern Source :YouTube screenshot Lanterns are a must-have when it comes to camping, and this lantern has a black light function that's recommended for combating insects. It has two switches allowing it to be used as a regular lantern as well, making it very convenient. [Video] 4:48 - Insect repelling lantern Oniyanma-kun - The Insect Repelling Dragonfly This item is shaped like an oniyanma, a natural enemy of horseflies and gnats. It's supposedly effective at scaring away and keeping away horseflies and gnats. This item is said to be difficult to obtain, but when two of these are hung on a table, any horseflies that were in the area are said to disappear, and users report that it actually works. [Video] 6:08 - Oniyanma-kun Deet-Free "Angel's Skin Vape" Insect Repellent For those who usually use a mint oil spray to protect their children from insects, this is a recommend deet-free product. The effect of the mint oil spray does not last very long, so you need to spray frequently, but this product lasts up to 8 hours. [Video] 7:41 - Angel Skin Vape Workman - DIAGUARD Long Sleeve T-Shirts Source :YouTube screenshot These T-shirts are woven with a special fiber that repels insects. It's convenient as all you have to do is throw it on and your bug proof! The video also discusses proper clothing to protect against insects. It recommends avoiding exposed skin, wearing light-colored clothes, etc. Experiments have shown that dark-colored clothes are more likely to result in insect bites. In addition to wearing long sleeves and long pants, it's also important to protect your face and neck area with a bandana or towel. [Video] 9:15 - DIAGUARD Long-Sleeved T-Shirts Muhi Alpha EX - Recommended for Insect Bites No matter how thorough you are in taking precautions against insects, there are times when you still get bitten by insects. In such cases, Muhi Alpha EX is great to have. The pharmacy recommended this product to the YouTuber in the video when he told them that he was going camping. [Video] 11:03 - Muhi Alpha EX Poison Remover Pump Kit - To Suck Out Toxins This poison remover is recommended in the event of a centipede or bee sting. If you carry it with you when camping, you can use it in the unlikely event that you're bitten by a poisonous snake as well. This product is shaped like a syringe and is pushed in instead of pulled out so that you can suck out poison even when you're alone. To see how it works, check it out in the video. [Video] 11:41 - Poison Remover Pump Kit Summary of Insect Protection for Camping in Japan This article introduced items that can be used by children and products popular among campers as insect repellents for family camping. There are many dangerous insects in Japan. If you're thinking of camping in Japan, make sure you take the proper precautions against insects and enjoy a safe camping trip! -
Video article 32:10
An In-Depth Look at 14 Different Camping Chairs! Comfortable, Low Chair Recommendations for Camping!
Things to Do- 119 plays
- YouTube
Chairs for the Outdoors Japan is in the midst of an outdoors boom. Camping, which can be enjoyed by families and solo campers alike, has become very popular, and if you're going camping, a comfortable chair for sitting around a campfire is something you definitely want to have. In this article, we'll introduce recommended low chairs for camping. Video Introduction This video, titled "Comparing 14 Different Low-Profile Camping Chairs! Cheap and Good for Life! Coleman, DOD, Snow Peak, Helinox, Captain Stag, Adirondack, Hilander" (14種比較!キャンプ椅子ローチェア!安くて良い一生モノ!コールマン、DOD、スノーピーク、ヘリノックス、キャプテンスタッグ、アディロンダック、ハイランダー), was uploaded by "Yama House [Camping Equipment Reviews]" (やまハウス【キャンプ道具レビュー】). A Thorough Comparison of 14 Low Camping Chairs! Source :YouTube screenshot Chairs are one of the most important pieces of camping equipment, and comfort and strength are immensely important when choosing one. In this article, we'll be taking a look at some low-profile camping chairs. If you're just starting camping or looking for a comfortable camping chair, be sure to check these out! ・Coleman Compact Folding Chair First up is the Coleman Compact Folding Chair. It weighs approximately 2.1 kg, has a weight limit of approximately 80 kg, and a seat height of approximately 28 cm. [Video] 0:57 - Coleman Compact Folding Chair The frame is made of aluminum, the seat is made of polyester, and the arms are made of natural wood. The seat portion is taut and firm making it quite comfortable. Because the seat is made of polyester, sparks from a campfire can easily put a hole in it, so care should be taken in this regard. It's the favorite chair of "Yama House," the video creator. Source :YouTube screenshot ・DOD Takibi Chair Next is the DOD Takibi Chair. Weighing approximately 3.3 kg and with a load capacity of approximately 100 kg, the chair is made of canvas fabric, which is resistant to holes caused by fire sparks, and is used exclusively for campfires. The frame is also made of steel and is heavy, so it's not easily blown away by the wind. [Video] 3:24 - DOD Takibi Chair ・Hilander Wood Frame Chair The Hilander Wood Frame Chair weighs approximately 3.3 kg, has a weight limit of approximately 80 kg, and a seat height of approximately 31 cm. The seat is made of cotton fabric. [Video] 5:27 - Hilander Wood Frame Chair ・CAPTAIN STAG EXGEAR Low-Style Reclining Chair The Captain Stag EXGEAR Low Style Reclining Chair weighs about 2.5 kg, has a weight limit of about 80 kg, and has a seat height of approximately 18.5 cm. The frame is made of aluminum, the seat is polyester, and the armrests are natural wood. The ability to recline is a key point of this chair. [Video] 7:53 - CAPTAIN STAG EXGEAR Low-Style Reclining Chair Source :YouTube screenshot ・Snow Peak Low Chair 30 The Snow Peak Low Chair 30 weighs approximately 3.6 kg and has a seat height of approximately 30 cm. When folded, the chair is long and narrow and can be placed in a storage case and slung over the shoulder. The frame is made of aluminum, the hardware is stainless steel, the armrests are made of bamboo, and the seat is made of polyester. When sitting down, the seat is taut and does not sag. [Video] 10:00 - Snow Peak Low Chair 30 ・ADIRONDACK Campers Chair The weight limit is approximately 80 kg. When purchasing online, be careful not to mistake it for the Small Campers Chair, which has a very similar design. The seat is made of cotton fabric and the frame is made of aluminum. [Video] 12:13 - ADIRONDACK Campers Chair ・ADIRONDACK Small Campers Chair This chair has a weight limit of approximately 70 kg and can be stored compactly. However, it may feel a little small if you're an adult. It's a comfortable size for children. [Video] 14:36 - ADIRONDACK Small Campers Chair ・Camping Moon High Back Armchair The Camping Moon High Back Armchair weighs approximately 3.25 kg, has a weight limit of approximately 100 kg, and has a seat height of approximately 36 cm. This chair is great for work as opposed to prolonged periods of sitting. [Video] 15:40 - Camping Moon High Back Arm Chair ・Helinox Chair One The Helinox Chair One is very light at approximately 890g, it has a weight limit of approximately 145kg, and a seat height of approximately 35cm. The seat is made of polyester & nylon material, and the frame is made of the strong TH72M aluminum made by the prestigious Korean company DAC. It's also incredibly compact! The fabric portion of the chair can be removed from the frame and folded compactly, making it lightweight and easy to carry. The mesh material seems to be breathable even in summer. The video shows in detail how to assemble and store it. [Video] 17:39 - Helinox Chair One Source :YouTube screenshot ・Moon Lence Outdoor Chair The Moon Lence outdoor chair weighs approximately 907g and has a weight limit of 150kg. The seat is made of 600D polyester Oxford fabric and the frame is made of 7075 aluminum alloy. The chair also features pockets on both sides and it is much more reasonably priced than the above Helinox Chair One, but there is a difference in materials. [Video] 22:05 - Moon Lence Outdoor Chair ・COLEMAN TWO WAY CAPTAIN CHAIR The COLEMAN TWO WAY CAPTAIN CHAIR weighs approximately 3.5 kg, has a weight limit of approximately 100 kg, and a seat height of 31-48 cm. The leg length can be adjusted in two positions. There is a deep pocket behind the seat as well. The seat is made of polyester, the frame aluminum, and the armrests are made of natural wood. The seat is not only taut but also thick. The firmness of the seat makes the chair comfortable to sit in. [Video] 24:43 - COLEMAN TWO WAY CAPTAIN CHAIR ・Captain Stag Jules Low-Style Easy Chair The Captain Stag Jules Low-Style Easy Chair is an ultra-low-style chair that weighs approximately 2.3 kg, has a weight limit of approximately 80 kg, and has a seat height of 15 cm. The seat is made of polyester and the frame is made of steel. The seat may feel lower due to the deep seating area. In the video, the size of the chair when folded is compared with others, so you can get an idea of what it's like. [Video] 27:30 - Captain Stag Jules Low-Style Easy Chair ・PROX Cross-legged Chair - Ultra Low Chair As the name suggests, PROX's cross-legged chair has an ultra-low seat, and the wide surface provides a comfortable sitting position. The chair weighs approximately 1.9 kg, has a weight limit of approximately 90 kg, and the seat height is 18 cm. It comes with a storage case, making it compact and easy to store, at approximately 50 cm. [Video] 29:21 - PROX Cross-legged Chair ・HIGHMOUNT Folding Stool The HIGHMOUNT Folding Stool weighs approximately 630g and has a weight limit of 80 kg. The seat is approximately 27 cm above the ground. The compact design means that it's not particularly comfortable to sit on, but it's very compact, especially when the lock at the base is undone. It also comes with a small storage case that resembles a tote bag and fits inside a backpack. It's perfect for camping as well as hiking and other outdoor activities. [Video] 30:53 - HIGHMOUNT Folding Stool Choosing a Sturdy Camping Chair That Can Be Easily Stored Source :YouTube screenshot If you are looking for a well-made, comfortable camping chair that is also compact, be sure to check out the video comparing the chairs when stowed away. The video also shows the differences between the chairs when viewed from the back, side by side. [Video] 16:18 - Comparison in storage bags Find the Right Low Chair for You! When purchasing a low chair, be sure to consider the fabric, functionality, design, and ease of assembly, instead of simply looking at price. When you find camping gear that catches your eye, it's important to see it in person. Visit a store, see and touch the product, and then make your choice. There are many attractive campgrounds in Japan. Find your favorite chair and enjoy the outdoors! -
Video article 13:10
Top 5 Coleman Family Tents! Cost-Effective and Easy-To-Use Tents!
Things to Do- 82 plays
- YouTube
Coleman Tents - Popular Even in Japan Due in part to the corona pandemic, camping is booming in Japan, particularly family camping. For those looking to buy a family tent, check out this list made by an advanced camper that introduces the Coleman tents he recommends. Let's get into it! Introducing Coleman's 5 Best Family Tents via Video This video, titled "Announcing the 5 Best Coleman Family Tents and Why" (発表します。これがコールマン オススメ ファミリーテント ベスト5の理由です。), was uploaded by "Yoshi channel." As the name suggests, it introduces the top five family tents from Coleman, as recommended by a Japanese outdoor specialist. These top 5 tents were determined by comparing functionality, ease-of-use, and cost-effectiveness. If you're thinking of purchasing a Coleman family tent, be sure to use this as a guide. No. 5 "Coleman Weather Master Cocoon III" - Outstanding Functionality Source :YouTube screenshot This is a heavy tent with many poles and thick fabric. This is a top-of-the-line Coleman tent. It takes two people about 40 minutes to set up, which is rather long, but it's a family tent with excellent functionality and can be used in all four seasons. The living room is larger than that of most Coleman family tents, so there's room for a cooler and shelves as well. In addition, two inner tents can be set up inside if you decide to purchase them (these are sold separately). The sleeping area is also spacious, with room for four sleeping bags, making it perfect for families! The many windows provide good ventilation as well. [Video] 0:20 - Coleman Weather Master Cocoon III No. 4 "Coleman Tunnel 2-Room House/LDX," - A Unique Tunnel Shape Source :YouTube screenshot The main feature of this tent is its four poles, which give it a tunnel-like shape when set up. The eaves allow for a spacious living room and prevent rain from entering the tent. It takes two people approximately 20 to 30 minutes to set up. Setting this tent up is not that difficult, as all you have to do is stand it up after threading the poles through. The secret-base-like shape is quite unique. We recommend this tent to those looking for a family tent that is easy to set up. The video shows two sleeping bags setup inside the tent, but he mentions that you could probably fit a third sleeping bag in. There is a large window in the back and smaller windows on both sides. [Video] 2:48 - Coleman Tunnel 2-Room House/LDX No. 3 "Coleman Tough Wide Dome IV/300" - Cost-Effective and Easy to Set Up Source :YouTube screenshot Among these tents, this one is quite reasonably priced. This tent is recommended for beginners because it has few poles and is easy to set up. Although it seems smaller than the other tents introduced here, the presenter introduces it as No. 3 in terms of price, setup difficulty, and ease-of-use. The inner sleeping area is designed to be spacious. However, it does not have a living room, so it would be best to attach a hexa tarp to it. If you're looking for a 4-person tent that is cozy and easy to set up, consider checking it out. [Video] 4:39 - Coleman Tough Wide Dome IV/300 No. 2 "Coleman Tough Screen 2 Room House" - Cost-Effective + Spacious Source :YouTube screenshot A popular Coleman classic. Spacious, yet reasonably priced! If you're looking to get the most bang for your buck, you should check out this family tent, perfect for 4 or 5 people to enjoy camping. It's also reasonably simple to set up and can be pitched by a single person. The living room is wide horizontally, with plenty of room for a table and chairs. Both sides can be opened and can all be converted to mesh, so you can enjoy camping comfortably in both summer and winter. A skirt can also be attached to prevent wind from entering from below. The bedroom has enough space for a family of four to relax together. [Video] 6:57 - Coleman Tough Screen 2 Room House/LDX No. 1 "Coleman Tough Screen 2 Room House/LDX" - Cost Effective, Spacious, & Functional Source :YouTube screenshot The greatest feature of this tent is that it has a dark room, making the inner portion completely dark. By adding a roof, this tent is water-resistant and also highly sheltered from light. It's also slightly heavier due to the thickness of the fabric, but Yoshi mentions that the storage bags have been made slightly larger starting from the 2020 models, making it easier to put away. The living room is quite spacious. The bedroom is large enough to fit four sleeping bags. It has seven windows, so ventilation and light can be controlled using these windows. You can even hang a lantern inside the tent. The tent costs just under 100,000 yen with all these features, which is a key point in evaluating it at No. 1. The high light-shielding properties are great for those with small children who still need to take naps as well. [Video] 9:05 - Coleman Tough Screen 2 Room House/LDX Choosing a Tent That Fits Your Camping Style When purchasing family tents and other outdoor goods, in addition to brand and price, durability, water resistance, and wind resistance are also important things to look out for. Even if you find a tent that's reasonably priced tents are expensive compared to the rest of your camping equipment. When you find outdoor goods that you're interested in, one option is to first try renting a tent to see how it feels, and if you like it, consider purchasing it from there. Don't forget to visit outdoor stores and ask the staff to clear up any questions you may have before making a purchase. Coleman releases more and more attractive family tents every year, so be sure to check out information on new products besides the ones listed here. -
Video article 7:29
Must-Have Camping Gear for Beginners! 6 Camping Essentials You Can't Do Without! Stakes, Stake Hammers, and More for Solo Campers!
Things to Do- 15 plays
- YouTube
Recommended Camping Gear Introduction Stakes and stake hammers used to set up tents in camp, sheets to lay down inside a tent, etc. etc. Although they don't stand out, there are certain pieces of camping gear that you don't want to be caught without. Outdoor activities are all the rage in Japan these days. For those who are just getting in to camping, here's a list of essential camping gear that every beginner should have. Video Introduction Photo:A tent This video, titled "6 Camping Essentials You Don't Want to Be Caught Without! Useful Camping Equipment [A Must-See for Beginners!]" (【無いと困る】キャンプギア6選!本当に役立つの地味な道具達【初心者必見】), was uploaded by "KAME SOLO CAMPING." What do beginner campers just starting to get their gear together think of when they hear the term "camping gear"? The video creator mainly camps solo in a one-pole tent. If you're looking to enjoy a similar style of camping, you should definitely check this out. Numerous Camping Gear Brands Photo:Camping at night Camping gear is available from a wide variety of brands. Among them, Coleman and Snow Peak are well-known in Japan, while Nordisk, ZANE ARTS, and Helinox are popular among campers looking to camp in style. Other camping gear is available from Workman and even from 100-yen shops all across Japan. When you think of camping gear, the first things that come to mind are probably tents, lanterns, tables, chairs, tarps, and coolers. This video introduces not the items that everyone thinks of, but rather, "simple yet useful" camping gear, such as the stakes and stake hammers used when setting up and taking down tents. The video also explains the advantages of each item that he has realized as an experienced camper. Six Pieces of Camping Gear You Won't Want to Be Without! Now, let's take a look at the recommended camping gear. Source :YouTube screenshot ・Forged Stakes Stakes are essential for securing tents, tarps, and poles. Some tents come with stakes, but in graveled riverbeds, they often bend, as shown in the video. To prevent this from happening, sturdy, forged stakes are a must. [Video] 0:46 - Forged Stakes ・Stake Hammer With Puller An easy-to-use stake hammer is all you need to secure your tent or tarp. The steel hammer shown in the video is also very useful for removing stakes. This hammer can be used to easily pull out stakes stuck in hard ground or long pegs. [Video] 2:13 - Stake Hammer ・Thick Waterproof Groundsheet A thick waterproof groundsheet can be placed under a tent and placed on top of various items to keep them from getting dirty. By preventing your gear from getting dirty, you can also shorten the cleanup time after returning home. [Video] 3:18 - Thick Waterproof Groundsheet Source :YouTube screenshot ・Leather Gloves Campfires are one of the best parts of camping. Many campers enjoy relaxing while gazing at the flames. Leather gloves that are resistant to heat are indispensable for this. In cold weather, you'll need firewood, but leather gloves are also great for preventing injuries when chopping wood. They are also useful when handling hot cookers when cooking. [Video] 4:37 - Leather Gloves ・Broom and Dustpan A broom and dustpan is useful for cleanup. You can sweep away leaves and sand from tents and dirt and dust from groundsheets. In addition, you can clean the inside of your car after camping. The video creator mentions that he prepares two items, one for clean items and one for dirty items, and he uses them separately. It's a small item that's not bulky, but it's useful when you have it. [Video] 5:32 - Broom and Dustpan ・Knife For cutting kindling, a full-tang one is recommended to avoid the knife breaking off at the base. A folding knife is useful for cooking, and should be used separately from the one for cutting firewood. [Video] 6:17 - Knife Summary This article introduced 6 pieces of camping gear that you can't do without! Although it's not a complete list of equipment that you can start camping with, but it's a list of items that you'll be happy you have. The information is from an experienced solo camper as well, so you know that it's reliable! There are various camping styles, including solo camping, family camping, and day camping. However, the gear introduced here will be useful no matter which style you choose. We hope you will find it useful. -
Video article 2:38
How to Use a Chimney Starter! Easy-To-Use Oga Charcoal That Holds Fire but Is Difficult to Light!
Things to Do- 489 plays
- YouTube
For Campers Who Have Difficulty Lighting a Campfire Making a fire gets easier the more you do it, but it can be difficult for novice campers. Campfires and barbecues are two of the best parts about camping and the outdoors. In this article, we'll introduce how to use a chimney starter so that those new to the outdoors and those who are finding it difficult to start a fire, can do so with ease. Video Introduction This video, titled "The Easiest Way to Start a Campfire|How to Light Charcoal Without Fail Even for Beginners" (1番簡単な火おこしのやり方|初心者でも絶対に失敗しない炭に火をつける方法), was uploaded by "Izu no Nushi Tsuri" (伊豆のぬし釣り). If you're like most campers you've probably struggled to light a fire at some point when camping or enjoying the outdoors. With the help of this video, you can learn how to easily light a campfire using a chimney starter. What is a Chimney Starter? Source :YouTube screenshot Chimney starters are also called charcoal starters. They're an excellent tool for easily starting a fire using the chimney effect (stack effect). In the video, a Uniflame Charcoal Starter is used. The video shows how easy it is to start a fire, even if you're new to using a chimney starter. This video shows how to start a fire without failure using a chimney starter. Using Oga Charcoal - Long Lasting But Hard to Start Photo:Oga Charcoal Although oga charcoal burns long and can be used for 2 to 3 hours, it can be difficult to light. In this video they use said oga charcoal. If you can master how to use it, you can start building fires efficiently. How to Use a Chimney Starter Source :YouTube screenshot So, without further ado, let's take a look at how to use a chimney starter. ・Stand the chimney starter up vertically and place the coals inside in an upright position. By placing the coals upright, they will burn more efficiently due to the rising air currents. [Video] 0:06 - Placing charcoal in the chimney starter ・Place the igniter under the chimney starter and light it. Underneath the chimney starter, there's a space for the igniter. After lighting the igniter, place the chimney starter on top of the igniter so that the flames rise into it. Then just let it sit for about 20 minutes. It's incredibly easy. [Video] 0:55 - Lighting the igniter The fire spreads from the igniter to the charcoal placed on top. Even a novice outdoorsman can light oga charcoal with a chimney starter. The idea behind the chimney starter is to use the air flow and the rising air currents to stimulate combustion. If you use the chimney starter to light a fire when you arrive at your campsite, you can start the BBQ (barbecue) when you've finished setting up your tent and other equipment. Use Air Flow to Efficiently Start a Fire Photo:A campfire When it comes to camping, outdoor cooking is what it's all about. Family campers and solo campers alike can enjoy cooking a variety of different foods. Some experienced campers make their own chimney starters using the chimney effect. However, beginners should start with a commercially available chimney starter. A chimney starter can start a fire in a short time and can be conveniently packed. The stainless-steel design also makes it rust-resistant. Summary of How to Use a Chimney Starter In this article, we introduced how to light charcoal using a chimney starter. You may have been surprised at how much easier this method can be. If you're struggling to build a campfire or not feeling confident about your fire making skills, it might be a good idea to have a chimney starter so you can enjoy your time camping in the outdoors while relaxing around a fire and eating delicious barbecue instead of worrying about getting your fire started. For some people, building a fire is one of the best parts of being outdoors, but if you prefer to prioritize mealtime over the time spent on starting a fire, consider picking up a chimney starter. -
Video article 12:11
A Beginner's Guide to Setting Up a Tent. Using the Popular Montbell Stellaridge Tent
Things to Do- 243 plays
- YouTube
A Camping Guide for Beginners Japan's camping boom was sparked by the Corona pandemic. Even people who had never been interested in camping before began to show interest in the activity. In this article, an advanced camper carefully demonstrates how to set up a tent for beginner-level campers. Video Introduction This video, titled "Setting Up a Tent for Beginners (Stellaridge) [Sora no Shita]" (初心者のためのテント設営(ステラリッジ)【そらのした】), was uploaded by "Outdoor Gear Rental Sora no Shita" (アウトドアギアレンタルそらのした). Tools Needed to Set Up a Tent Source :YouTube screenshot If you're new to camping or other outdoor activities, let's first review what you'll need to set up your tent. [Video] 0:08 - What you need to set up a tent Below is a list of tools needed to set up a tent. ・Tent ・Tent poles ・Stakes ・Four guy lines ・Flysheet ・Guy line tensioners ・Groundsheet It's important to make sure you have these items before assembling your tent, let alone leaving for camping so you don't get stuck with a half-assembled tent when camping. Assembling the Body of the Tent Source :YouTube screenshot Now, let's look take a look at the steps to set up a tent. 1. stand upwind from the tent and unfold the body of the tent. The trick is to keep the door of the tent as far downwind as possible. [Video] 0:12 - Unfolding the body of the tent. 2. Fasten the poles together. The poles are connected together with bungee cords, so they are easily connected. [Video] 0:45 - Connect the tent poles 3. Thread the poles through the sleeves attached to the tent diagonals so that the two poles are crossed. 4. Connect the poles to the rings. Connect the ends of the poles to the rings at the four corners of the tent. Connect the two adjacent poles first. [Video] 2:45 - Connecting the poles to the rings at the tent's corners. [Video] 2:53 - A close-up view on how to connect the poles to the corner rings. From the third pole, the poles will start to bow when connecting them. Connect the poles to the rings while keeping the poles in contact with the ground. This keeps the tent from standing makes it stable when setting it up. [Video] 3:15 - Connecting from the third pole 6. When the fourth pole is connected the poles will bow and the tent will stand up at this point. You've now finished setting up the body of the tent. Once the tent is standing, it can be easily moved, so at this stage, it may be moved to a place where you'll actually be sleeping in it. When deciding on a place to set your tent up, consider whether the ground is level and free of unevenness, as well as distance from facilities, such as restrooms, shade from trees, and vantage points. How to Anchor a Tent Source :YouTube screenshot Once you've decided where you want to position your tent, it's time to secure it in place. 1. hammer the stakes into the ground. If the ground is hard, use rocks or other objects to hold the tent in place instead of trying to force the stakes into the ground which can cause them to bend or break. [Video] 4:13 - Hammering the stakes 2. Next we'll secure the tent with ropes. Take out the four guy lines and secure the tent. There are loops located about halfway up the tent sleeves, to which the guy lines will be tied. The key is to use a bowline knot, as reef knots can be difficult to untie. If you don't know how to tie a bowline know, be sure to watch the video to learn how. Make a loop in the middle of the guy line and pass the end of the guy line through the loop. Then, pass the end of the guy line through the loop again, and pull it through to complete the knot. [Video] 5:40 - How to Tie a Rope Knot (Bowline Knot) How to Set Up a Fly Sheet Source :YouTube screenshot 1. Check the position of the zipper and apply the flysheet with the zipper facing the entrance of the tent. [Video] 8:12 - Hanging the flysheet over the body of the tent 2. Pass the guy lines attached to the body of the tent through the slits in the flysheet. The video shows how to thread the guy lines through the slits in the flysheet, so beginner campers should be sure to watch this part. [Video] 9:03 - Threading the guy lines through the flysheet slits 3. Connect the four corners of the flysheet to the four corners of the body of the tent as shown in the video. Pass the poles through the rings attached to the four corners of the flysheet. [Video] 10:35 - Connecting the body of the tent to the flysheet 4. Secure the entrance of the tent with stakes. After that, the tent sides are also tensioned with stakes to create space and improve airflow in the tent. 5. Secure the guy lines with stakes or rocks to finish setting up the tent. In this case, the use of guy line tensioners makes it easier to create tension. Things a Beginner Outdoorsman Should Know Photo:Camping equipment Next, we'll go over some things that a beginner outdoorsman who will be camping for the first time should know. First of all, it's essential to prepare tools for camping, practice setting up a tent, and research the location where you'll be camping. Although this sounds obvious, beginners to camping should start by getting their tent and other equipment all ready to go. Research how much you need to spend to get started camping. After you have a complete set of equipment, what you don't want to do is spend so much time setting up your tent when you arrive that you have no time to enjoy the camping trip itself. After purchasing a tent, we recommend that you watch videos and practice setting up your tent. Camping is a great way to enjoy nature and it's not like staying in the city; there are dangers to be aware of. Care should be taken to avoid dangerous areas, such as cliff bottoms. In general, you should enjoy outdoor activities, such as camping, in a safe place. Depending on the weather, rivers may rise and other environmental disasters can occur. This is not limited to beginners in outdoor activities. You should gather necessary information on the weather and surrounding conditions to the best of your ability in advance. Summary If you're a beginner outdoorsman who is just starting to camp, be sure to refer to the video and learn the steps for setting up a tent. Whether or not you can enjoy camping will depend on whether or not you can set up your tent without hassle. In Japan, there are many attractive campgrounds where you can enjoy nature and explore the outdoors. There are many outdoor activities and camping experiences in Japan that you won't find in other parts of the world. We hope you have a great time camping in Japan! -
Video article 16:57
100-Yen Shop Camping! Useful Goods for Solo Camping, and How to Use Them! Check Out This Awesome, Unexpected Equipment!
Things to Do- 162 plays
- YouTube
Handy Goods From Japan's 100-Yen Shops Camping is immensely popular in Japan! With camping's rise in popularity, solo campers looking to explore nature are on the rise. However, it can be a bit pricey to get started camping when you have to buy all of the equipment. This is where 100-yen shops like DAISO, Seria, and Watts come in handy. In this article, we'll introduce some 100-yen items that can be used for solo camping. Video Introduction This video, titled "[100-Yen Camping Gear] 100-Yen Items That kimu23 Would Use When Solo Camping" (【100均キャンプ道具】きむ23のソロキャンプに使えそうな100均アイテム), was uploaded by "CAMP HACK," a channel run by kim23, a popular Japanese YouTuber and avid solo camper. For important items, like tents, sleeping bags, and sierra cups, you can get authentic outdoor gear, but for casual camping gear and useful outdoor goods, 100-yen shops are the place to go! At Japan's 100-yen shops, you can find many lightweight and easy-to-use items. You may find it easier to get started with solo camping casually by first purchasing 100-yen items, and then gradually moving on to more authentic camping gear. Japan's 100-Yen Shops and Camping Equipment Photo:DAISO The three 100-yen stores that carry the stylish camping equipment featured in the video are DAISO, Seria, and Watts. In response to Japan's recent solo camping boom, 100-yen shops now offer full lineups of outdoor-related goods. Also, you can use different items for different purposes, such as kitchenware and gardening tools, by slightly modifying them, or even by making your own camping tools. The best part is that 100-yen goods are easy on the wallet! Precautions When Buying Camping Gear From Japan's 100-Yen Shops Photo:Outdoor goods for sale In the video introduced here, goods from a 100-yen store are used as outdoor items. However, it's important to note that some of the items in the video are not used how they were originally intended to be used. Since this is not how the manufacturer recommends using them, if you use them as camping equipment, you'll be using them at your own risk. Care should also be taken around campfires. Outdoor Equipment From Japan's 100-Yen Shops Shown in the Video So, with that out of the way, let's take a look at the 100-yen camping gear introduced in the video. These 100-yen items, which are not originally intended for outdoor use, are transformed into useful outdoor goods! Check out the video to see how they're used! Source :YouTube screenshot ■5-Piece 500 Yen Burner Boil water and enjoy simple cooking with just 5 items: a stainless-steel plate, a stainless-steel bowl, a paulownia wood cutting board, solid fuel, and a cooker stand from Seria! [Video] 1:00 - ¥500 Burner made with 5 100-yen items ■A tiered accessory container that can be used as a seasoning container. Store salt, pepper, and other powdered seasonings in these containers made to hold small beads, decorative parts, and other items. The small containers can also be connected together, and there's even an 8-tiered type as well, so those who are particular about their spices can use this to keep their camping food nice and tasty! [Video] 3:04 - A seasoning container using an accessory case Source :YouTube screenshot ■Cosmetic carrying containers for liquid condiments Seria's cosmetic refill set can hold three types of liquids. It comes with a clear zip-up case, which is great for preventing leaks. [Video] 4:33 - Cosmetic containers used for liquid condiments ■Bungee cord with clips When camping or outdoors, there are sure to be times when you want to hang something to dry. In such cases, Seria's bungee cord with clips can be used for various purposes. Since both ends can be hooked to something, you can hang various things by hooking the cord to a tarp and then hanging different items with the clips. [Video] 5:27 - Bungee cord with clips ■Flexible band carabiner for hanging a lantern The band can be wrapped around a pole to hang a lantern. [Video] 6:05 - Flexible band with carabiner Source :YouTube screenshot ■A tableware band to hold cups together Even when camping solo, you may want to bring some small dishes with you. In such cases, these tableware band can hold the dishes firmly together when stacked. [Video] 6:30 - Tableware band ■Ultra-light stainless steel chopsticks Lightweight and non-slip stainless steel chopsticks [Video] 7:00 - Stainless steel chopsticks ■Mini tongs that don't tip over when set down Although palm-sized, these tongs are surprisingly convenient even for grabbing heavy items. [Video] 7:18 - Mini BBQ tongs ■Mini crates for LP gas canisters These mini crates are stackable if you have several of them. They're great for neatly storing smaller items when solo camping. [Video] 7:35 - Mini crates ■A mini stool that you can place items on The mini crates above, as well as other items you don't want to set on the ground, can be placed on top of this simple folding chair from Seria. [Video] 8:03 - Mini stool Source :YouTube screenshot ■Stylish garbage bags If you don't like the look of simple trash bags, Seria's temperature retaining paper bags can be used to create a brightly colored trash corner. They're also convenient for separating burnable and non-burnable trash. [Video] 8:20 - Temperature retaining bags as trash bags for solo camping ■A mini pipe-hammer that's more than meets the eye DAISO's mini hammer can also be used to hammer stakes. It may require a little technique, but it's great for when you want to lighten your load as much as possible when solo camping. [Video] 9:32 - Mini stake hammer ■ A carabiner for use in places where stakes can't be used If there are trees or stones in the place where you want to stake a rope and you can't, you can use DAISO's 3-hook carabiner to split the rope into two halves. A small item that does an unexpectedly large job. [Video] 10:03 - 3-hook carabiner ■A wire trash rack used as a firewood rack A trash rack used with a plastic bag becomes a firewood rack, to avoid firewood getting wet from being placed on the ground. It is also lightweight and compact. [Video] 10:54 - Wire firewood rack Source :YouTube screenshot ■An amazing stainless steel towel rack used as a side table A stainless-steel towel rack that can be used as a side table for solo campers. The shape can be used to hang things as well. It can be used for other purposes as well, according to your needs. [Video] 11:21 - Campfire side table ■Sliding wire sink rack Usually used for sinks, but can also be hooked to a fire pit to boil water. [Video] 11:59 - Campfire rack ■Hanging clips for hanging up chopsticks and cups Can be used to hang chopsticks or gloves that to prevent them from falling on the ground [Video] 13:45 - Hanging clips ■900 yen for a convenient rack Assembling Watts' 3-tier Multi Free Rack allows you to organize your smallest goods for easy access. [Video] 14:55 - Multi free rack Summary of 100-Yen Shop Camping in Japan Camping is an outdoor leisure activity that can be enjoyed by one person or many, but it can require a large budget to prepare a full-scale set of camping equipment. For more expensive items, you can go for rentals or look for deals at specialty stores, but for smaller items, 100-yen goods can do the trick, as shown in the video. Solo camping, in particular, often involves day-trip camping and carrying gear alone, so compact 100-yen camping gear can be very useful! It is valuable to have information that introduces items that someone has actually used and found useful. Be sure to take a look at the video, which shows how these 100-yen camping items can be used. -
Video article 7:37
Solo campers introduce the charms of "Buubetsu no Mori Campsite" in Shiraoi County, Hokkaido, in a video! What is its charm?
Things to Do Food & Drink Nature Travel- 83 plays
- YouTube
Video introduction of "Buubetsu no Mori Campsite" in Shiraoi-gun, Hokkaido This video, titled "[Hokkaido Women's Camping] Bubetsu Forest Camping Field" (【北海道キャンプ女子】ブウベツの森キャンプ場), was uploaded by "Keco Cam ??ʕ•ᴥ•ʔ" (けこキャン ??ʕ•ᴥ•ʔ). Bubetsu Forest Camping Field: Information About the Campground in Hokkaido, Japan View this post on Instagram This post was shared by Bubetsu Forest Camping Field (@bubetsu.forest.camping.field) Bubetsu Forest Camping Field opened in Hokkaido in July 2020 in Shiraoi, Hokkaido, a town rich in nature. It is a handmade campground that was originally built by professional forestry workers. There are 13 auto-camping sites, 3 pet-friendly sites, 30 free sites, and 2 BIG sites. This cozy campground is popular with a wide range of campers, including beginner campers, solo campers, family campers, and women's campers. Since Bubetsu Forest Camping Field has only been open for a short time, reviews say that facilities such as restrooms and cooking facilities are new and clean. Although it is not a large campground, the quiet forest is comfortable and allows visitors to settle in and enjoy themselves. The ground at the site is covered with a thick layer of volcanic gravel, which is said to prevent puddles from forming. Furthermore, a wood-chopping station is available at the campground, and firewood can be used as much as you like free of charge. You can also enjoy a relaxing campfire. Those who wish to bring their pets camping can also rest assured that there are pet-friendly sites available. Reservations for Bubetsu Forest Camping Field must be made at least one day in advance, so please make reservations online or by phone. Tents, Camping Gear, and Supplies for Women's Solo Camping! View this post on Instagram This post was shared by Tentmark Design (@tentmark2011) Many female campers enjoy solo camping at Bubetsu Forest Camping Field as well. The video creator, Keco Cam, introduces some of her favorite camping gear in the video. One of the best parts about camping is the delicious food. Having useful kitchenware will make your camping experience more enjoyable. Women's Solo Camping Gear ・Tent: tent-Mark Designs CIRCUS TC ・Bedding mat: Hilander Inflator Mat (with pillow) ・Cot: FIELDOOR Wooden outdoor cot ・Rack: Hilander Wooden 3-tier Rack 600 ・Generator: Smart Tap Portable Power Station PowerArQ mini Red ・Cooker: Snow Peak Aluminum Personal Cooker Set, Chums Hot Sandwich Cooker ・Lantern: Snow Peak Hozuki Lantern ・Cutting Board: JUICY Of the above, the most notable is JUICY's cutting board, which is made to order and made from high-quality wood. In the video, the cutting board is used to cut asparagus and other vegetables, and is also used as a potholder for hot dishes. [Video] 6:35 - JUICY Cutting Board By having your favorite camping gear with you, you can create your own original space and enjoy women's solo camping even more. Women's Camping and Delicious Camping Food! Some Quick and Tasty Recipes! This camp meal is an omelet rice! Shiraoi, Hokkaido is famous for its eggs, and in the video they use fresh eggs from an egg vending machine and frozen chicken rice to make a delicious rice omelet. Here's the recipe. [Ingredients] ・Eggs: 2 ・Frozen chicken rice: 1 bag ・Ketchup: to taste 1. Stir-fry frozen chicken rice in a frying pan over heat. 2. Transfer the fried chicken rice to a Sierra cup and pack it in tightly. 3. Put the chicken rice (shaped like the Sierra cup) back in the pan. 4. Pour egg around the chicken rice, and finally pour ketchup over the rice. You can also watch the video to see how to make the simple, yet delicious camping meal. [Video] 5:06 - How to Make A Simple Camping Rice Omelet There are many different kinds of camping food, such as barbecue and curry, but as shown in the video, using frozen food is an easy way to make camping food. There's something about cooking in nature that makes this type of food taste better than it does at home. Also, while it's fun to cook camping meals with friends, the best part of camping solo is that you can cook whatever you want, whenever you want. Is Solo Camping in Japan as a Woman Dangerous? Things to Be Careful Of! Source :YouTube screenshot If you're a woman looking to do some solo camping, we recommend that you choose a location and be thorough with security. Let's look at some points to keep in mind. ・Choose a campsite with a resident caretaker Some campgrounds do not have a resident caretaker. Some campgrounds are not staffed, especially at night, so if you are planning to camp solo, choose a campground with a full-time caretaker. ・Set up your tent in a public place. When setting up your tent, you may be tempted to choose a quiet place to enjoy your time alone, but we recommend that you set up your tent in a place where there is a lot of pedestrian traffic. It's also a good idea to set up as close to family campers as possible to protect yourself from any campers looking for any women camping alone. ・Avoid posting on social networking sites in real time Be careful about social networking sites such as Instagram and YouTube. Posting photos on social networking sites in real time can expose your whereabouts. ・Prepare security goods and locks Always have some emergency supplies, such as a personal alarm, by your bedside, and lock your tent when you go to bed, so that if something should happen, you can immediately warn others of danger. Summary This time we introduced a video about solo camping for women. In winter, Bubetsu Forest Camping Field in Hokkaido is covered with snow and has different scenery in spring and summer. There are also hot springs in the area, so it's a good place to stretch your legs. In addition, there is a barbecue restaurant where you can enjoy Shiraoi beef, a specialty of the area, and a Shiraoi beef store that sells beef directly to customers. With Japan's recent camping boom, women's solo camping has become increasingly popular. The appeal of solo camping is that you can enjoy the luxury of having nature all to yourself with your favorite camping gear. The light of a lantern at night and the sunlight filtering through the lush hardwoods is sure to create a photogenic atmosphere to post on Instagram. Despite all of the enjoyment, women's solo camping can be dangerous. To enjoy camping safely, please keep in mind the precautions we introduced above. Bubetsu Forest Camping Field is a good spot for camping beginners and female solo campers. If you're planning on camping in Hokkaido, consider checking it out! ◆Bubetsu Forest Camping Field◆ 【Address】110-2, Ishiyama, Shiraoi 【Hours】10:00 – 16:00 【Telephone】080-4044-3388 【TripAdvisor】Bubetsu Forest Camping Field https://www.tripadvisor.com/Attraction_Review-g1120904-d21149822-Reviews-Bubetsu_Forest_Campground-Shiraoi_cho_Shiraoi_gun_Hokkaido.html -
Video article 5:54
CB Cans - A Cheap, Easy-To-Use, and Convenient Alternative to OD Cans When Camping IF You Know Their Limitations…
Things to Do- 45 plays
- YouTube
The Two Types of Gas Canisters for Camping in Japan Whether it be solo camping or family camping, the number of campers in Japan is increasing rapidly. Gas canisters, both CB cans and OD cans, are a must-have item when it comes to cooking while camping. In this article, we'll focus on the advantages of CB cans for beginners who aren't familiar with the differences between Japan's different gas canisters. Video Introduction: CB Cans - Readily Available at 100-Yen Shops All Across Japan This video, titled "[Gas] The Difference Between CB and OD Cans (Which is Better for Camping? Explaining the Key Differences Between the Two)" (【ガス】CB缶とOD缶の違いについて(キャンプでは結局どっちがいいのか? 使い分けのポイントについて解説)), was uploaded by "sugita outdoor channel" (杉田アウトドアch / sugita outdoor channel). Sugita, the camper in the video, enjoys solo camping and auto-camping in small groups. He explains the advantages of CB cans, which are cheap and easily obtainable in Japan, and how they're different from OD cans. CB Cans Photo:A gas stove A CB can, short for "Cassette Gas Bombe," is a gas canister often used in household stoves in Japan. It has the following characteristics: ・Pros The advantage of choosing CB cans is that they are inexpensive, costing only about 100 yen per canister. Their thin and compact shape makes them easy to store, and they can be easily purchased at convenience stores and supermarkets in Japan. Furthermore, in the past, there were not many burners that could be used with CB cans, but the number of burners compatible with CB cans has increased dramatically in recent years, making them more accessible. ・Cons When the temperature of the canister drops below 5°C, a pressure drop occurs that causes the output of the can to decrease. In severe conditions, such as below freezing temperatures, CB cans may become unusable. Those planning to camp in winter should be especially careful. [Video] 0:42 - CB Cans OD Cans Photo:An OD can An OD can, short for "Outdoor can," is a gas canister designed for outdoor use. Compared to CB cans, which are long and narrow, OD cans are characterized by their sturdier shape. ・Pros OD cans can be used in colder conditions, such as during the winter or when climbing high-altitude mountains. Those camping in the dead of winter or climbing mountains at high altitudes will want to bring OD cans with them. ・Cons OD cans are more expensive than CB cans, costing about 500 yen per can, and they are larger than CB cans, making them difficult to store. Another disadvantage is that they are difficult to obtain, being purchasable only at outdoor specialty stores or online. Useful Items to Have With CB Cans Photo:Solid fuel Sugita, the video creator, says that he has never experienced any trouble using CB cans when camping. However, he mentions that he actively prepares so that he can avoid problems when using CB cans. In order to prepare for situations where you can't use a CB can, such as on a cold morning, here are some useful items you can take with you. ・A Heater To keep the CB cans in usable condition, they should be kept from the cold as much as possible. To aid in this, a heater is a useful item to have. Even in the worst-case situation where a CB can is not available, you can still boil water on the top of the heater. It's also a good idea to protect the gas canister by wrapping a cloth around it to prevent it from getting cold in the open air. ・Solid Fuel You can also bring solid fuel just in case you need to boil water for making hot beverages. They're quite compact, so be sure to bring several. ・OD Cans It is a good idea to have at least one OD can with you in case of an emergency. It will also be useful in the early morning when the temperature is lower. ・Fire Starter It's hard to keep warm when it's cold. We recommend bringing items that can easily start a fire. Gas Canisters and Expiration Dates When storing CB and OD cans, care should be taken to avoid gas leaks and you should also be weary of expiration dates. Gas canisters deteriorate over time. While they have a long shelf life (approximately 7 years from the date of manufacture), you should be sure to check the manufacture date on the bottom of the can. Also, if there are any deformities or rusting on the lid or the cylinder, it's possible the cans are deteriorating at a faster rate than normal. Storing Gas Canisters Photo:A gas canister Gas canisters should be stored away from fire and direct sunlight, and in a dry place below 40°C (104°F). It's also dangerous to place them near cooking areas where fire is present, on the ground under the scorching sun, or in a car, even if you're camping or do other outdoor activities. Properly Disposing of Gas Canisters When disposing of CB or OD cans, be sure to use them up before discarding them. Whether or not to puncture the gas cans after they are used up depends on the local government. Check the disposal method of the local government in advance and dispose of the cans accordingly. Summary of Japan's CB Cans, a Convenient Piece of Camping Equipment CB cans are cheap, available at most supermarkets in Japan, and are very useful! However, if you purchase them without knowing how they work, you might find yourself in an undesirable or possibly even dangerous situation. Be especially careful when camping in winter. Don't forget to prepare other items to keep the gas canisters from getting too cold and also backup items in case it does happen. OD cans are another great item to have in case it gets colder than you were expecting. There are many awesome campgrounds in Japan. Enjoying hot meals and warm drinks while camping in the crisp, clean air of winter is truly a unique experience as well. Be sure to check the weather conditions on the day of your camping trip so you can be well equipped and ready to go! -
Video article 10:31
How to Clean and Dry a Tent After Camping in the Rain! Useful Tips and Appliances for Camping in Japan!
Things to Do- 122 plays
- YouTube
Enjoy Camping Even During Japan's Rainy Season Japan has four distinct seasons, each of which has its own variety of natural beauty to enjoy, such as cherry blossoms and autumn leaves. However, after spring comes the rainy season, otherwise known in Japanese as "tsuyu." Camping is experiencing a big boom in Japan right now, and so, in this article, we'll introduce how to clean up when it rains during a camping trip. Video Introduction: How to Clean Up After Camping in the Rain and Useful Appliances Photo:Camping in the rain This video, titled "How to Clean Up After Camping in the Rain and Useful Appliances" (雨キャンプ後のテント片付けと、便利な物を紹介), was uploaded by "HIRO channel," a channel focused on introducing various camping-related videos. Have any of you ever had the experience of being rained out during a camping trip? Tents are already a pain to pack up and clean, but this is especially true if it rains when camping. Mud and dirt get stuck to your tent and other equipment making it a hassle to clean. Perhaps you don't even want to try camping in the rain because of how difficult it may seem. Well, this video will show you how to easily clean up your tent and tarps after camping in the rain, as well as some useful tips to make cleaning your camping gear easier. Be sure to check out this quick 10-minute video to learn how to easily clean up and maintain your tents and other equipment. What to Do When It Rains While Camping Photo:A campground In Japan where it's said to rain on average about once every three days, it's not uncommon that the weather turns to rain on the day you're going camping. Thus, although not mentioned in the video, we'll first introduce a few measures to take when camping in the rain. First, when camping in the rain, be careful where you set your tent up. Avoid camping near rivers and set up your tent on gravel or other areas with good drainage. Next, when setting up your tent, hang the tarp first, then the tent. This creates a space to keep out the rain and makes the process go more smoothly. If it's raining when you're packing up to leave, we recommend putting the tarp away last. In addition, to combat the rain, tents and tarps should be coated with a water repellent to keep rainwater off them, which will make your job easier when it comes time to take them down. Finally, place a sheet under the tent to combat the rain. This will prevent water and dirt from getting into your tent and make cleanup easier. Knowing the above measures will help you safely enjoy a camping trip even in the rain. Pack It in a Dry Bag and Head Home Source :YouTube screenshot Cleaning up a tent after camping in the rain can be very difficult. It can be especially difficult to take home a tent that is covered in dirt or sopping wet. That being said, if your tent or tarp is large and you have a lot of stuff, pack it wet in dry bag, such as the "Coleman 110L Dry Bag." The large capacity makes it very convenient, especially when compared to carrying several smaller garbage bags made of thicker material. Rinse With Water After You Get Home When you arrive home, first wash your tent or tarp with water. The dirt will be even harder to remove once it dries, so it's important to wash it before the dirt has a chance to dry. After washing off the dirt, hang the tent outside in a covered area, such as under the eaves of your roof or on a balcony, or inside in a bathroom. Dry in the Sun or With Convenient Appliances Source :YouTube screenshot Once water is no longer dripping from the tent/tarp, allow it to dry. Make sure to dry it thoroughly, as, if not properly dried, mold can start to grow. As for drying, if the weather is good, dry it in the sun. If it's difficult to dry in the sun due to rain, a clothes dryer or futon dryer can be used. If you put a washed tent or other items in a drying bag, a tent will dry in about 4 hours. If you place a sheet or mat on or under the bag, you can kill two birds with one stone by drying them together. Even if not directly wet from the rain, sleeping bags and other items may be damp as well, so we recommend that you dry them in a bag made for drying bedding. This is a really handy trick for cleaning up after a rainy camping trip. And That's How You Handle Camping in the Rain As shown in the video, the first thing to do when you finished camping during a rainy camping trip is to quickly bring back the we gear and dry them thoroughly after rinsing them with water. In addition, if you make use of some convenient household appliances, cleaning up after a rainy camping trip will be a breeze. If you've had a bad experience camping in the rain and felt discouraged from going camping because of the cleanup, consider trying these methods to help make your camping trip one to remember! "HIRO channel" uploads a variety of videos. You can enjoy various camping videos, including introductions of camping gear, camping videos showing different areas, camping cooking videos, and more. Be sure to check them out! -
Video article 3:36
Camping in Japan - How to Clean Up After a Campfire! Key Points for Campfire Cooking in Japan!
Things to Do- 100 plays
- YouTube
Only You Can Prevent Wildfires Japan is currently experiencing an outdoor boom. As an island nation surrounded by the sea, Japan is also blessed with abundant nature. Because of this, it's possible to travel from the heart of Tokyo to a campground surrounded by nature in just a couple hours, and new styles of camping, such as solo camping, are on the rise. Camping is a lot of fun, but it's important to remember to clean up after your campfire to prevent wildfires and other accidents. In this article, we'll take a look at how to clean up a campfire. Video Introduction: Cleaning Up After a Campfire Photo:A campfire This video, titled "How to Clean Up After a Campfire at a Campground" (キャンプ場での焚き火の後片付け方), was uploaded by "Hiro, Camping" (ヒロ、焚き火). Campfires are used for a variety of purposes, including cooking and warmth. Some people simply like relaxing and getting lost in the flames of a campfire. That being said, cleaning up after a campfire is a necessary part of a safe and enjoyable camping trip in Japan. If you fail to clean up after a campfire, it can cause wildfires and other problems for many people. It's important to extinguish fires properly to protect our rich natural environment. Some Campgrounds Allow Open Flame Cooking, Others Don't Some campgrounds allow campfire cooking, while others do not. Be sure to check if the campground you're using allows open flame cooking. If open flame cooking is not allowed, you'll need your own campfire pit, fire sheet, etc. How to Clean Up Charcoal and Ashes After a Campfire Source :YouTube screenshot First, any coals and wood should be burnt down as much as possible. The extinguished coals and ashes can then be placed on a 60-micron aluminum foil. After that, clean up the surrounding area, picking up anything that has dropped under the fire pit. Restore the area to its original state as best as possible. [Video] 0:08 - Picking Up Ashes Water can then be poured over the collected charcoal and ashes. From there, you can wrap the remains in the aluminum foil compactly, removing as much air as possible. Then, wrap that in another sheet of foil and finally, place it in a plastic bag. If ashes from your campfire are scattered nearby, be sure to pick them up as well. Leaving ashes behind is a known cause of environmental pollution. The ashes, as well as the remaining charcoal will not decompose and be replaced by soil, so please do not bury them in the ground. After gathering the remaining ashes, pour water over them. Check the temperature of the ground around you just to be sure as well. Reducing the risk of fire as much as possible will not only protect you, but also other campers and the environment. Dispose of garbage from any meals you made while camping, as well as ashes and charcoal from campfires, in areas designated by the campground. Camp Fire Cleanup Summary Photo:Campfire remains When building a campfire at camp, clean up after the fire properly. Don't leave any ashes or coals behind with the mistaken belief that they will decompose. Failure to ensure that you clean up after a campfire could lead to a wildfire or other major problems. Keep in mind that even the slightest amount of carelessness can lead to a major accident. Everyone has their own way of enjoying camping and other outdoor activities, but remember that you're in a public place and should observe rules and manners. If you go to a campground that prohibits open flame cooking, don't forget to prepare a fire pit and other outdoor equipment. Please make sure to keep the cleanup of bonfires in mind with the video introduced here, and by all means, enjoy the rich nature of Japan while camping! -
Video article 12:49
A Solo Camping Guide for Japan - A Checklist of What to Bring With Just a Backpack!
Things to Do Nature- 82 plays
- YouTube
Japan's Solo Camping Boom Due in part to the Corona pandemic, camping has become a popular way to get outside and enjoy nature and the outdoors in Japan. Traditionally, camping was often a family or group activity, but "solo camping" has been on the rise as of late. Solo camping is a great way to get away from the stresses of everyday life and enjoy some time alone in a quiet environment. Having some alone time to get in touch with nature can be relaxing, and it also provides an opportunity for self-reflection. In this article, we'll take a look at some useful gear for solo camping. Solo Camping Gear Photo:Camping gear As we mentioned previously, solo camping refers to "one-person camping," and it has been growing in popularity in Japan in recent years. With Japan's current boom in solo camping, lots of useful and stylish solo camping gear is now available on the market. Video Introduction Source :YouTube screenshot The video we'll be going over today, titled "[Camping Gear] Camping With Just One Backpack! Solo Camping Gear Introduction" (【キャンプ道具】バックパック1つでキャンプが出来る!ソロキャンプギア紹介), was uploaded by "Takibito channel" (焚き人channel). The video introduces compact, convenient, and lightweight camping gear and backpacks. Various gear that can be packed into one backpack is introduced in an easy-to-understand manner. ※Please note that the order in which the gear is introduced is different from the order shown in the video as they've been divided based on their purpose. A Comfortable Tent and Sleeping Area Source :YouTube screenshot First, we'll introduce tents and bedding to bring when solo camping. The tent introduced in the video is the LOCUS GEAR Khafra HB Kit. It can be easily stored in a backpack and is also stylish and waterproof. The tent is secured with Snow Peak Solid Stakes and Boundless Voyage Titanium Peg Solid stakes using an MSR Stake Hammer to pound the stakes into place. As for sleeping gear, a NANGA AuroraLite 600DX sleeping bag and Therm-a-Rest NeoAir XTherm are great options! If you need a pillow, a MARCHWAY Inflatable Camping Pillow is recommended. For a night light, a BRISIE LED Lantern is waterproof, dustproof, and can also be used as a mobile battery. Must-Have Gear for Building a Fire Source :YouTube screenshot Next, we'll introduce gear for building a campfire that can fit in a backpack when solo camping. The first step in building a campfire is to chop kindling. The 38cm Husqvarna hatchet is a high-quality Swedish-made hatchet that is sharp and weighs just 600 grams. After chopping some wood, it's time to get a fire started. To build a fire, a Morakniv Mora Knife, SOTO Slide Gas Torch, and Conifer Cone Butterfly Saw are used. For easy fire starting, the match-shaped SOLSTICKAN FIRELIGHTERS are used as a handy igniter, and their combustion duration of 8 minutes makes it easy to ignite firewood. When the fire is about to be go out, a Bushcraft Fire Blaster (Sx) is used to keep it going. To protect your hands, use Tent-Mark Designs King Tongs and GRIP SWANY G-1 gloves. Solo Camping Gear for Cooking Source :YouTube screenshot The next solo camping gear we'll introduce is what to bring so you can enjoy cooking. This includes cooking utensils, etc. that can fit in a backpack. Camp food is an important part of the camping experience. The STC Picogrill 398 and the Boundless Voyage Titanium Fire Grill make the perfect cooking tables and are highly popular in Japan. The Snow Peak Aluminum Personal Cooker Set is easy to store! The set includes a frying pan and two shallow cookers. WILD-1 Brass Sierra Cups are also useful. After cooking up some delicious food it's time to relax. Relax and unwind with the SOTO Field Hopper ST-630 table and Helinox Tactical Chair, or enjoy a cup of freshly brewed, delicious coffee in a Snow Peak Ti-Single Cup. THE NORTH FACE Venture Jacket is great for any sudden rain that might occur. A Backpack to Hold All Your Solo Camping Gear Source :YouTube screenshot A Seibertron backpack can hold all of the solo camping gear featured in the video! The pockets and side pouches on the backpack can be well utilized to store all of your camping gear. The backpack is also waterproof, has a large storage capacity, and is comfortable to carry. Store all of your solo camping gear compactly in one backpack! See below for all solo camping gear introduced above! ■NANGA AuroraLite 600DX ■38cm Husqvarna hatchet ■Snow Peak Aluminum Personal Cooker Set ■Snow Peak Ti-Single Cup ■THE NORTH FACE Venture Jacket ■LOCUS GEAR Khafra HB Kit ■Therm-a-Rest NeoAir XTherm ■Snow Peak Solid Stakes ■Boundless Voyage Titanium Peg Solid ■MARCHWAY Inflatable Camping Pillow ■STC Picogrill 398 ■Boundless Voyage Titanium Fire Grill ■GRIP SWANY G-1 ■MSR Stake Hammer ■SOTO Field Hopper ST-630 ■Tent-Mark Designs King Tongs ■Morakniv Mora Knife ■SOTO Slide Gas Torch ■Conifer Cone Butterfly Saw ■SOLSTICKAN FIRELIGHTERS ■Bushcraft Fire Blaster (Sx) ■WILD-1 Brass Sierra Cups ■BRISIE LED Lantern ■Helinox Tactical Chair ■Seibertron backpacks Summary of Solo Camping Gear for Camping in Japan In this article we introduced solo camping gear that fits into one backpack. The video shows you how to take it out of the backpack, so you can use it as a reference when packing. Be sure to check it out. If you're planning on camping in Japan for the first time or feel that solo camping might be too difficult, your best bet is to gather information from advanced campers so you can save time when decided what gear to buy. Enjoy Japan's beautiful outdoors with a solo camping adventure! -
Video article 1:00
Glamping experience at Mobility Resort Motegi, Haga-gun, Tochigi! Plenty of ways to enjoy the forest! Let's enjoy just the right adventure!
Things to Do Travel Nature- 46 plays
- YouTube
Video Introduction of Mobility Resort Motegi/Camp Village, Haga-gun, Tochigi, Japan This video, titled "[Mobility Resort Motegi] Starry Sky Forest Camping Village|Lotus Tents Promo Video" (【モビリティリゾートもてぎ】森と星空のキャンプヴィレッジ ロータステントPV), was created by Mobility Resort Motegi (モビリティリゾートもてぎ). Mobility Resort Motegi is located in Motegi, Tochigi, in Japan's Kanto region. It has a camping field called Starry Sky Forest Camping Village Mobility Resort Motegi next to a popular circuit where some of the world's top races are held. What is Mobility Resort Motegi? Photo:Hello Woods, Mobility Resort Motegi Mobility Resort Motegi, formerly known as Twin Ring Motegi, is a theme park in Motegi, Tochigi where visitors can enjoy motor sports and the great outdoors. Mobility Resort Motegi, owned by Honda Mobilityland, changed its name in 2022 to coincide with the merger of Suzuka Circuitland Co., Ltd. And Twin Ring Motegi Co., Ltd. Mobility Resort Motegi is a family-friendly theme park. In the park area, you can enjoy an adventure course and rides and explore nature in a forest. At Hello Woods, you can go for a ride on ziplines. There's also the Starry Sky Forest Camping Village where you can enjoy glamping (a fancy type of camping where gear is provided for you), BBQ, and relaxing hotels. If you're a fan of motorsports, the Honda Collection Hall, with approximately 300 Honda automobiles and motorcycles on display, is a must-see attraction. [Video] 0:13 - The Camping Area Surrounded by Nature Located Near the Circuit Camping, Glamping, and Log Cabins! Outdoor Activities at Starry Sky Forest Camping Village Photo:Camping There are three ways to spend time with family and friends at Starry Sky Forest Camping Village at Mobility Resort Motegi: ・Camping Pitch a tent and enjoy the outdoors with a relaxing fire. ・Glamping A fancy camping experience for those looking to enjoy the outdoors without the hassle of setting up and taking down tents. ・Log cabins Enjoy the outdoors in any season thanks to the log cabins that even come with air conditioning. [video] 0:36 - Glamping in Lotus Tents Things to Do at Mobility Resort Motegi: Athletic Activities and More! Photo:An aerial view of Mobility Resort Motegi Here, we'll introduce some popular activities at Mobility resort Motegi. ・Mega zipline: Wing Enjoy a view of nature and the nearby race track from the sky with this 1,837 foot-long-zipline at Hello Woods. ・Forest Obstacle Course: DOKIDOKI A huge, tree-climbing athletic facility that resembles an acorn tree. This popular activity features 39 difficulty levels, allowing everyone from elementary school students to adults to enjoy the challenge. ・Forest Labyrinth: ITADAKI A three-dimensional maze themed on the ecosystem of the park's forests, where visitors collect stamps from 14 locations on their way to the top. The huge animals and plants are really impressive. ・Forest Family Walk: TEKUTEKU Visitors can enjoy a game-like stroll through the Hello Woods' forest, while taking pictures, learning, and relaxing. ・Attractions Featuring Cars and Motorcycles There are more than 10 attractions for people of all ages and experience levels. Visitors can drive a car with a driving school motif, as well as motorcycles, off-road vehicles, and even race cars. In addition, there are many other original activities available only for a limited period of time to enjoy nature and activities limited to guests only. Please check the official website for more information! Glamping at Mobility Resort Motegi: Rates, Meal Fees, Etc. Photo:A t-bone steak Various glamping plans are available at Mobility Resort Motegi, including those that can be enjoyed in both rotary tents and bell tents, and which offer a full range facilities. Plans include a half-board plan that includes a T-bone steak BBQ dinner and breakfast using fresh, local ingredients, a plan that includes a pass to the park, and an overnight plan that allows guests to bring their own food and cooking equipment and enjoy their stay how they please. We also recommend checking out their original accommodation plans, such as the Birthday Plan. The price per "room" starts from 25,800 yen (~$182 USD) for an overnight stay in the lotus tents with no meals included. How to Get to Mobility Resort Motegi (Motegi Circuit) There are several ways to get to Mobility Resort Motegi, and here we'll list a few of them. Mobility Resort Motegi From Tokyo Station (Shinkansen) To get to Mobility Resort Motegi from Tokyo Station, take the shinkansen to Utsunomiya Station (50 mins) and then from Utsunomiya Station, take a bus (90 mins) or taxi (60 mins) to Mobility Resort Motegi. Mobility Resort Motegi From Tokyo Station (Local Train) From Tokyo Station, take the Limited Express train to Mito (80 mins) and then take a bus to Mobility Resort Motegi (90 mins). Mobility Resort Motegi From Haneda Airport and Narita Airport If you're wondering how to get to Mobility Resort Motegi from Haneda or Narita Airport, the easiest way is to first make your way to Tokyo Station and then use one of the two routes above. Summary of Mobility Resort Motegi Surrounded by a natural forest, Mobility Resort Motegi is the perfect place to get away from your hectic daily life. Mobility Resort Motegi also has great reviews, with many people saying that they were able to enjoy themselves all day without getting bored and wanting to visit again. Glamping is also a great option for those with small children. If you're visiting the race track to enjoy some motorsports, consider staying at the nearby camping/glamping area and enjoying a night under the stars with some BBQ! 【Official Website】Mobility Resort Motegi 【TripAdvisor】Mobility Resort Motegi -
Video article 23:15
Choose the Right Cooler When Camping in Japan! Comparing Usages, Size, and Cooling Ability! AO, Daiwa, and Coleman
Things to Do- 42 plays
- YouTube
Coolers, a Necessity for Summer Camping in Japan Summer in Japan is characterized by strong sunlight, high temperatures, and excessive humidity. Compared to spring and fall, which are quite pleasant, it's important to be careful of heat stroke and food poisoning during summer. Therefore, we'd like to introduce a video on coolers, a necessity for enjoying outdoor activities and camping during summer in Japan. Video Comparing Coolers This video, titled "My Recommended Coolers [Comparing 4 Types] (For Camping BBQ Outdoor Use) Coleman, Logos, Daiwa, and AO, Four Popular Brands" (おすすめクーラーボックス【4種比較】(キャンプ BBQ アウトドア用)コールマン・ロゴス・ダイワ・AOクーラー人気ブランドを一挙に紹介します!), was uploaded by "solo camp & camp cooking in Japan TANA channe." What Should You Look for When Buying a Cooler? Material? Cooling Ability? Style? Photo:A cooling bag Outdoor activities, such as BBQ and camping, are very popular in Japan as of late. Many people are in the process of planning outdoor leisure activities for the hot summer ahead. You might be one of them and are even considering buying a cooler. What are the most important things to consider when purchasing a cooler? Size, cooling ability, whether it's hard or soft, design... these are all important factors to think about. You should first decide on what it is that you want your cooler to accomplish. In this article, Tana, a solo camper in Japan, compares the usages, features, and storage capacity of four different coolers for campers having trouble choosing the right cooler. In addition, the cooling ability of three coolers of different sizes, designs, and materials are evaluated based on hourly temperatures and ice retention. This article is especially for those looking for a cooler for camping, festivals, picnics, etc., but aren't sure which one is best. We think this will help you choose the one that's right for you! AO Coolers 12L Canvas Soft Cooler Source :YouTube screenshot The first cooler on the list is the AO Coolers 12L Canvas Soft Cooler. As its name suggests it's a soft cooler. At first glance, the bag is so well designed that it doesn't look like a cooler. The outdoor pattern is quite stylish. The bag, which looks like a bucket, can be made into a square shape by buckling the clips on the sides. In this shape, it is almost as large as the DAIWA Cool Line 800 8L Cooler introduced next. The capacity is 11.35 L, and it can hold 12 350 ml cans plus 2.2 kg of ice. The video shows how different sized bottles fit in the cooler. [Video] 0:26 - Features of the AO Cooler DAIWA Cool Line 800 8L Cooler Source :YouTube screenshot The DAIWA Cool Line 800 8L Cooler comes from a fishing equipment manufacturer. Check it out if you're looking for a compact cooler for solo camping, fishing, or other outdoor leisure activities. It comes with a carrying strap and can be carried over the shoulder. The compartment is large enough to just barely hold a 1.5-liter bottle. It's a great cooler if you're only planning on bringing a few items. [Video] 6:10 - Daiwa Cooler Features LOGOS Hyper Subzero Cooler M 12L Source :YouTube screenshot The LOGOS Hyper Subzero Cooler M 12L is another soft cooler. This cooler has a cool silver design and can hold a 2L plastic bottle horizontally. The long sides are made of a hard material, so it can't be broken down into a smaller size, but it is designed to be thinner. It can be used for a variety of activities, including camping and festivals, making it quite attractive. Because of its stylish appearance, this product is also recommended for those who are particular about the appearance of their camping equipment. [Video] 8:04 - Features of the LOGOS Cooler Coleman Extreme Ice Cooler 25L Source :YouTube screenshot The Coleman Extreme Ice Cooler 25L is the largest cooler shown in the video, but it's a soft cooler and can be folded. It's a bit large for a solo camping cooler. Tana, the solo camper in the video, utilizes it to hold other items as well. The metal fittings on the side are plastic, so you need to be a little careful when carrying heavy items inside it. [Video] 9:06 - Features of the Coleman Cooler Comparing Cooling Ability - AO, Daiwa, and Coleman The cooling ability of coolers is important when camping in the summer. But do size and shape determine a cooler's cooling ability? Check out the video for a comparison of the cooling ability of different coolers from AO, Daiwa, and Coleman. The indoor temperature is 26.6 degrees Celsius, and one bag of ice is put in each cooler to test the temperature and ice retention over time. ・After approx. 1 hour Coleman: 14.5°C, 20% of ice melted AO: 9.4°C, 10% of ice melted Daiwa: 13.6°C, 15% of ice melted At this point, we can say that the ice retention is AO > Daiwa > Coleman. ・After approx. 4 hrs. Coleman: 13.5°C, 40% of ice melted AO: 14.9°C, 20% of ice melted Daiwa: 15.7°C, 30% of ice melted At this point, the ice retention is still the same - AO > Daiwa > Coleman. ・After approx. 6 hours Coleman: 13.5°C, 80% of ice melted AO: 14.1°C, 70% of ice melted Daiwa: 15.4°C, 70% of ice melted At this point, AO and Daiwa are about equal. ・After approx. 8 hours Coleman: 19.3°C, 90% of ice melted AO: 14.2°C, 80% of ice melted Daiwa: 13.9°C, 80% of ice melted After more than 8 hours, the Daiwa cooler maintained the coolest temperatures. [Video] 10:16 - Comparing three different coolers [Video] 17:11 - Results after 4 hours [Video] 22:09 - Results after 8 hours The Coleman is the largest of these coolers, so it's not possible to make a blanket judgment, but as an example, this test may be useful for those considering replacing or buying a new cooler in the future. Tips for Keeping Your Cooler Cool Photo:A cooler Here are some tips for keeping your cooler cool that aren't related to the characteristics of the cooler. ・Make sure that the items to be placed in the cooler are cooled in advance. If possible, cool the inside of the cooler box as well. ・Place refrigerants on the top and bottom of the cooler. ・Use a combination of large and small ice cubes. ・Don't drain the water after the ice has melted. ・Minimize opening and closing of the cooler. ・Avoid hot ground and place in a cool place out of direct sunlight, such as in the shade. Find the Cooler That Works Best for You and Enjoy Your Time Camping! Coolers are useful outdoor equipment for storing food for camping and BBQs and drinks for picnics. In summer, use coolers to prevent heat stroke and food poisoning, but be careful when handling drinks and food. There are many beautiful campgrounds in Japan. To enjoy the summer outdoors to the fullest, choose a cooler that suits your individual style and that will keep your food and other items cold.